These docs cover RhinoArtisan 7.0, which is still in beta. The contents are provisional: features and pages can still be added, changed or removed before the final release.
Organic Modeling & Sculpting
Sculpt
 Sculpt
Sculpt turns any solid, surface, SubD or mesh into a piece of digital clay. You paint on it with a brush and the surface deforms under the cursor, the way you would work wax on the bench. It is made for the organic part of a design — a face on a signet, a wave in a shank, the muscle of a panther — where parametric commands get in the way.

Run ArtisanSculpt, or click Sculpt on the File tab. Anything already
selected is picked up by the panel.
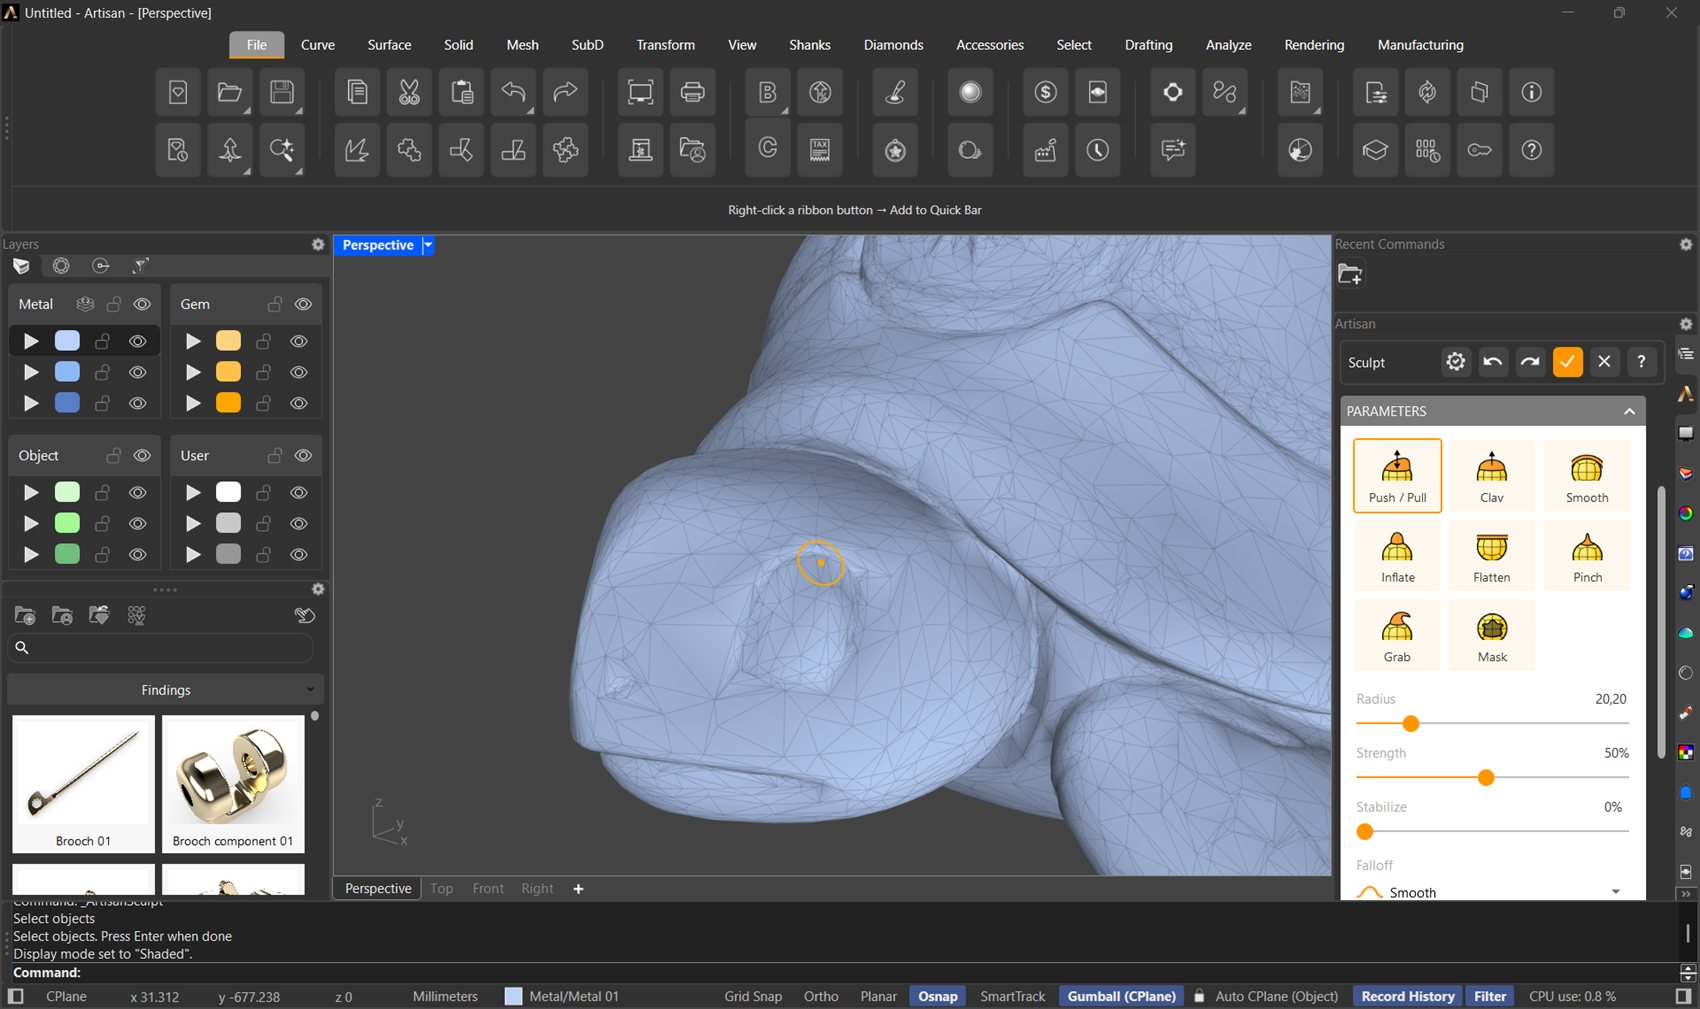
The brush follows the surface; the panel stays out of the way
The brushes
Eight brushes, one click each. The active one is framed in orange.
| Brush | What it does |
|---|---|
 Push / Pull Push / Pull | Moves the region along the surface normal — the steady, general-purpose brush. |
 Clay Clay | Builds material up in even layers toward a plane over the surface, like adding wax with a spatula. |
 Smooth Smooth | Relaxes each vertex toward its neighbours, melting away lumps and facets. |
 Inflate Inflate | Pushes every vertex along its own normal — swells and rounds rather than translating. |
 Flatten Flatten | Presses the region toward its average plane, for crisp planar faces. |
 Pinch Pinch | Draws vertices toward the centre of the brush along the surface, sharpening ridges and creases without denting them. |
 Grab Grab | Captures the region on click and drags it with the cursor — pair it with the Hard falloff and the core moves rigidly. |
 Mask Mask | Paints protection instead of deforming: masked areas resist every other brush. |
Three modifiers work mid-stroke, and the panel keeps them on screen — Ctrl: invert · Shift: smooth · [ ] or + − : radius:
- Ctrl inverts the brush — push becomes pull, Clay carves instead of building, Mask erases. The brush circle turns blue while inverted.
- Shift switches temporarily to Smooth; release and your brush is back.
- [ and ] (or − and +) shrink and grow the radius, and only react while the brush is over the mesh — typing elsewhere in Rhino is never intercepted.
Strokes are spaced by distance travelled, not by time — a slow, careful pass and a fast one deposit exactly the same amount of material.
Brush parameters
- Radius — the brush size in model units, auto-sized to the object when the session starts. The slider is tuned so half its travel covers the fine end of the range — precision where jewelry lives.
- Strength — how hard each stroke bites, 5–100%, default 50%.
- Stabilize — the lazy mouse: at 0% the brush follows your cursor raw; as you raise it, the brush trails a steadied path behind the cursor, for clean continuous lines along a shank or a crease.
- Falloff — how the effect fades from centre to edge: Smooth (soft everywhere, the default), Hard (a firm plateau in the inner half, then a soft drop), or Constant (full effect across the whole radius).
Mesh Detail
Resolution, exactly where you need it and nowhere else:
- Dynamic Detail — while you brush, the mesh refines itself under the brush until no edge is longer than Detail, and cleans up what falls below it. Detail appears where you sculpt; the rest of the mesh stays light.
- Detail (mm) — the target edge length, 0.05–1.00 mm. It is an absolute size, so it maps directly to the smallest feature you intend to print.
- Densify — remeshes the whole object to roughly double resolution in one pass, when the canvas as a whole is too coarse.
- Simplify — halves the face count with the same reducer as the Decimators, when the mesh has grown heavier than the design needs.
Symmetry
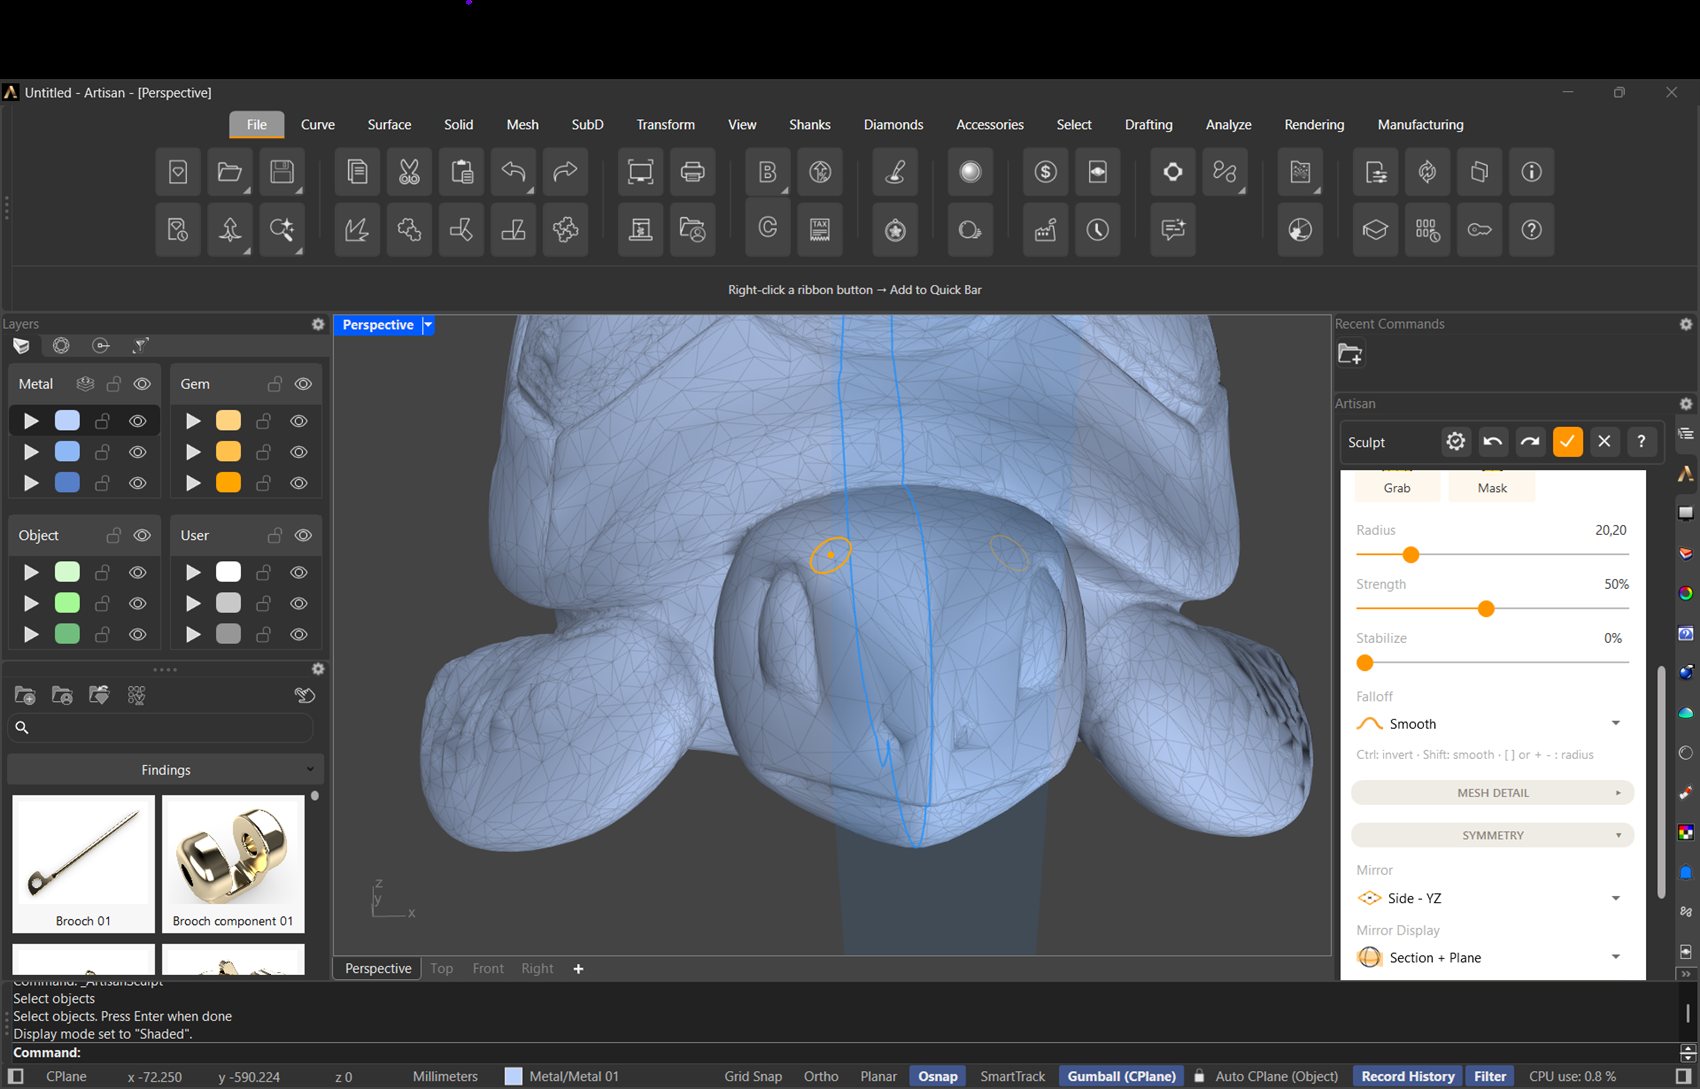
One stroke, both sides: the mirror plane drawn across the piece, the ghost brush working the other half
- Mirror — None (default), Top - XY, Front - ZX or Side - YZ. Every stroke is repeated at the mirrored point, with the ghost circle showing where.
- Mirror Display — Section Only draws just the seam where the plane crosses the mesh; Section + Plane (default) adds the translucent plane itself.
- Plane Color — the colour of that plane, blue by default.
Radial
- Radial Copies — repeats every stroke around an axis, 1 to 32 copies (1 = off). With a mirror active, the mirror of every copy comes along too.
- Axis — X, Y or Z (the default, since rings are built on the world Top plane).
Radial is what rosettes, bezels, and everything built around a centre are sculpted with: model one petal, and the flower follows.
Mask
Masked vertices are frozen — no brush moves them. Paint the mask by hand with the Mask brush (it shows as a blue-gray tint), or use the section’s tools:
- Mask Gems — automatically masks every vertex near a gem in the document, fading out over a short distance, and reports how many vertices around how many gems. It only ever adds protection, so it stacks with what you painted by hand.
- Blur Mask — softens the mask border for a gradual transition.
- Invert Mask — swaps protected and free areas.
- Clear Mask — removes it all.
Mesh
The bookkeeping section, and two habits worth keeping:
- Mesh info — the live vertex and face count, updated after every stroke.
- Weight — the live weight of the piece in grams (using the document’s metal), and once you have removed material, how many grams and what percentage you have saved since the session started.
- Delete Original — on by default: confirming replaces the source object. Switch it off to keep the original alongside the sculpt.
- Show Wire — draws the wireframe over the preview (it hides itself during each stroke to keep the brush fluid).
- Mesh Color — the working colour of the clay, gold by default.
Strokes, defaults and finishing
- Undo Stroke / Redo Stroke — the header buttons walk back and forward through your last 16 strokes, independent of Rhino’s undo.
- Save defaults — stores the whole setup — brush, falloff, symmetry, radial, detail, colours — as your starting point for every future session.
- Accept (✓) — bakes the sculpt as a single undo step. The result is a
Sculpt element: it appears in the Outliner, and running
ArtisanEditon it later reopens the sculpting session on the same mesh, with your setup and painted mask restored — the clay never really dries.