Twist Bezel Ring
Lesson 42 of 62
Shank Profiles: Left Side
Sign in to access this lesson
This lesson is part of Precision & Detail Design, which can come bundled with a RhinoArtisan Commercial license subject to current promotions. Log in with your customer account, or get in touch and we'll set you up.
Customers only
Solo para clientes
This lesson is part of Precision & Detail Design, which can be included with a RhinoArtisan Commercial license subject to current promotions. If you've already purchased and don't see it in your account, get in touch.
Objective: Learn how to build one half of the shank by placing and editing profiles along the curve.
Profiles Command
Select the curve and go to the “Accessories” tab. Click on the “Profiles” command

and use the asset P08 from the library, as it suits our needs. Click on Edit.
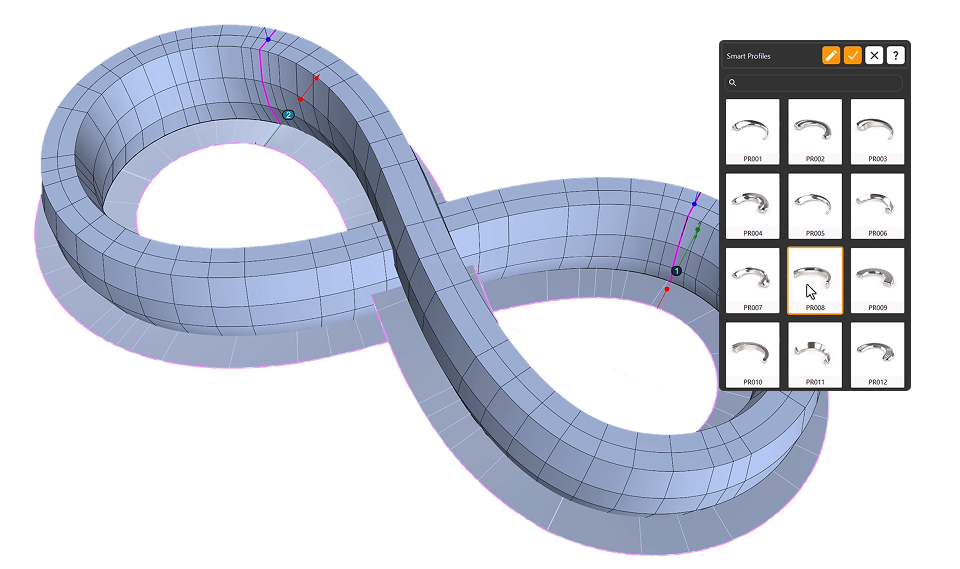
Add the Reference
Move the cylinder to another layer, then add it to the selector to use it as a reference for creating the shank. You can now hide the cylinder to adjust the profiles.
Small gumballs with numbers help identify each profile. They are also listed in the panel.
Profile One
Start by editing profile one:
- Change its curve to number 007 from the asset selector.
- Set its width to
2 mmand its height to3.06 mm. - Make sure the type is set to Solid.
- Click Accept to confirm this profile.
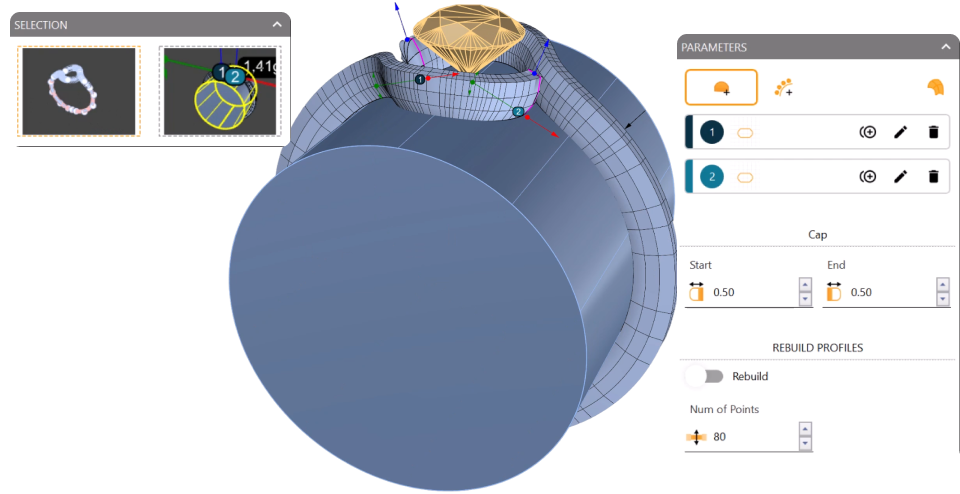
Duplicate Along the Curve
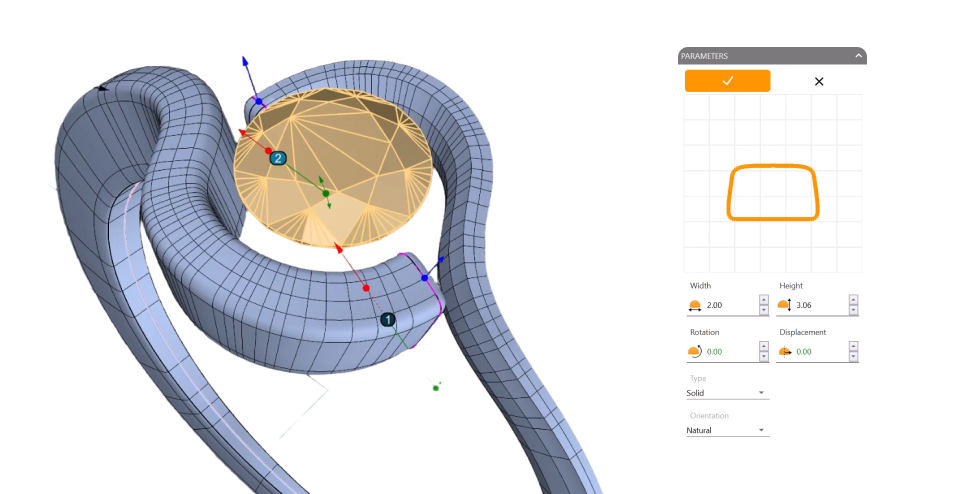
Duplicate profile one and place the copy at the top center of the curve. With object snap enabled you’ll see guides such as quad or end appear — click at that point to place the copy.
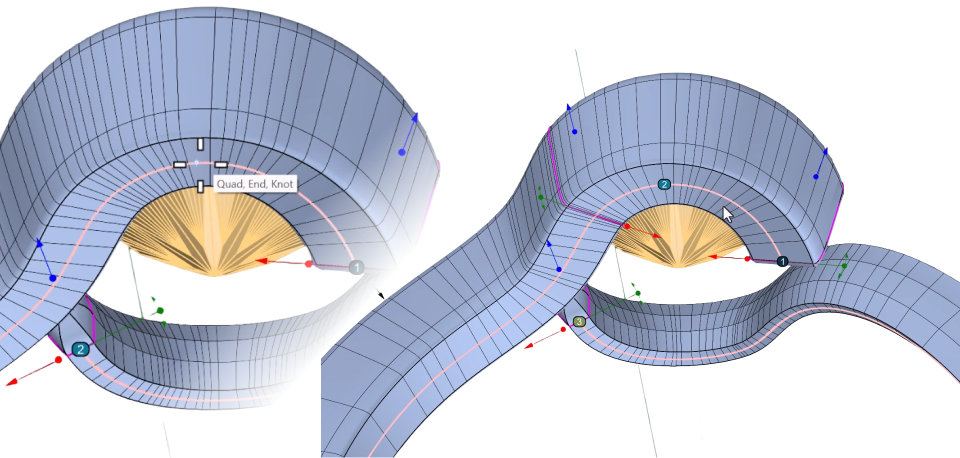
Duplicate profile two and place it at the upper left end.
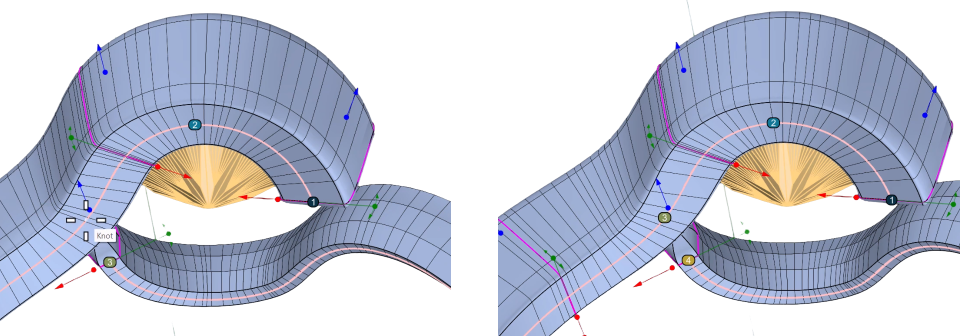
Duplicate profile three and place it on the left middle section of the shank. In this case it becomes profile number four: edit it, change the height to 2.27 mm and confirm.
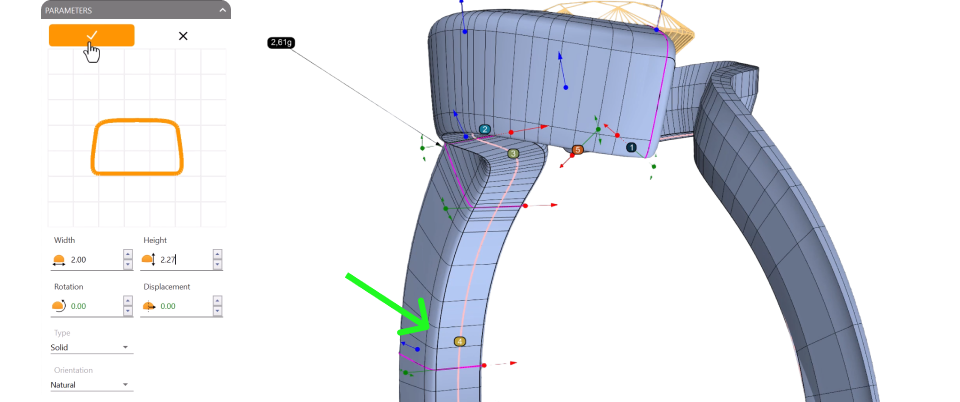
Duplicate profile four and place it on the bottom part. Activate the four viewports and check from the front view that it is centered. Edit this last profile setting the height to 1.5 mm and confirm.
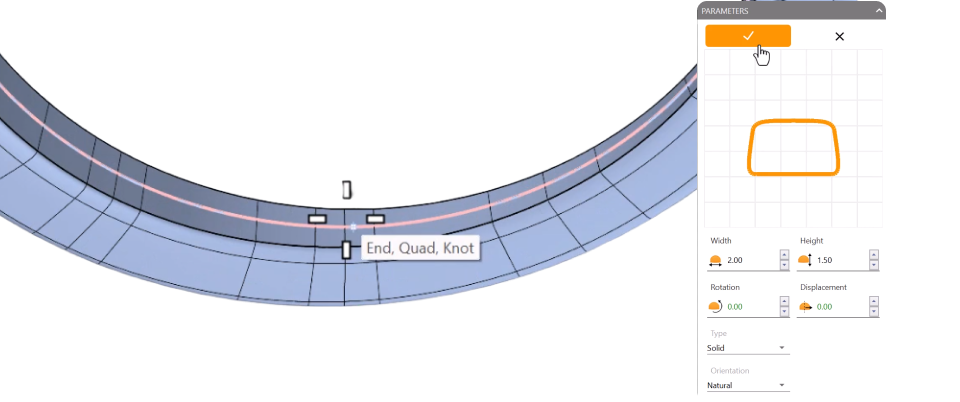
If you make a mistake or don’t place a profile correctly, you can always drag the numbered gumball to reposition it.
Video Lesson
Next Step
Half of the shank is created. Next, we’ll mirror the profiles to the right side.
Almost there — you still have some lessons to complete. Jump to the next one →
Impersonating — progress and reviews are disabled.
Course completed
You've completed Precision & Detail Design 🎉
Great work. Get your certificate of completion and, if you have a minute, let other jewelers know what you thought of the course.