Twist Bezel Ring
Lesson 39 of 62
Shank Curves
Sign in to access this lesson
This lesson is part of Precision & Detail Design, which can come bundled with a RhinoArtisan Commercial license subject to current promotions. Log in with your customer account, or get in touch and we'll set you up.
Customers only
Solo para clientes
This lesson is part of Precision & Detail Design, which can be included with a RhinoArtisan Commercial license subject to current promotions. If you've already purchased and don't see it in your account, get in touch.
Objective: Learn how to create the two curves that define the crossover shank.
Ring Size Curve
Go to the “Shank” tab and click on the “Curve” command.

- Set the size to United States 6 1/2.
- Click Accept to create the curve.
Crossover Curve
Click on the “Curve” command again, but this time use the fourth option. Adjust a few parameters:
- Offset:
1.25 mm. - Move in Z:
1.73 mm. - Start on circle:
1.04 mm.
Leave the other parameters as default and click Accept to create the second curve.
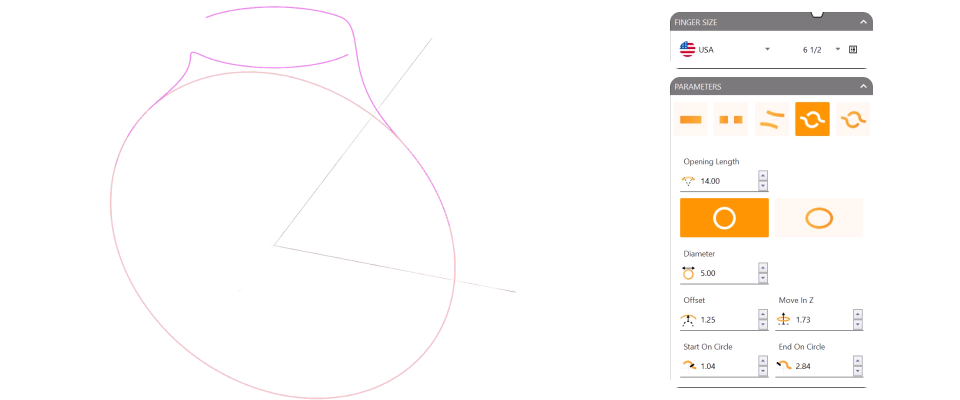
Change this last curve to a different layer so you can distinguish between them easily.
Video Lesson
Next Step
Next, we’ll create a reference cylinder and pull the curve onto it.
Almost there — you still have some lessons to complete. Jump to the next one →
Impersonating — progress and reviews are disabled.
Course completed
You've completed Precision & Detail Design 🎉
Great work. Get your certificate of completion and, if you have a minute, let other jewelers know what you thought of the course.