Curves to Stunning Snowflake
Lesson 15 of 62
Reference Lines
Sign in to access this lesson
This lesson is part of Precision & Detail Design, which can come bundled with a RhinoArtisan Commercial license subject to current promotions. Log in with your customer account, or get in touch and we'll set you up.
Customers only
Solo para clientes
This lesson is part of Precision & Detail Design, which can be included with a RhinoArtisan Commercial license subject to current promotions. If you've already purchased and don't see it in your account, get in touch.
Objective: Learn how to draw the three lines that define one arm of the snowflake.
Prepare the Layer
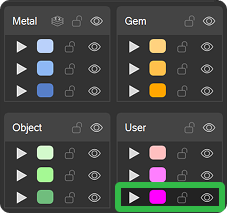
Select one of the user layers in the layers panel. Every reference curve will be created there, which keeps the model tidy from the start.
Main Line
Work from the front view. Go to the “Curve” tab and click on the “Line” command.

Make sure the GridSnap option is turned on to make positioning easier.

From the center point, draw a line 10 mm to the right along the X axis. Use 10 grid squares as reference, or type 10 in the command bar and click to the right.

First Diagonal
Right-click to repeat the last command. Then, 4 mm from the center on the X axis, create a diagonal line 4.5 mm long.
- Select the point.
- Type
4.5in the command bar. - Position the curve in the diagonal direction.

Second Diagonal
Again from the X axis, create another diagonal line, this time 2.5 mm long.

Video Lesson
Next Step
With the three lines ready, we’ll thicken them with the Offset command and mirror the arm.
Almost there — you still have some lessons to complete. Jump to the next one →
Impersonating — progress and reviews are disabled.
Course completed
You've completed Precision & Detail Design 🎉
Great work. Get your certificate of completion and, if you have a minute, let other jewelers know what you thought of the course.