Hoop Earrings
Lesson 7 of 62
Clasp Arms
Sign in to access this lesson
This lesson is part of Precision & Detail Design, which can come bundled with a RhinoArtisan Commercial license subject to current promotions. Log in with your customer account, or get in touch and we'll set you up.
Customers only
Solo para clientes
This lesson is part of Precision & Detail Design, which can be included with a RhinoArtisan Commercial license subject to current promotions. If you've already purchased and don't see it in your account, get in touch.
Objective: Learn how to extrude the two arms that close the earring at the top opening.
Line at the Opening
From the perspective view, draw a straight line at the upper opening.
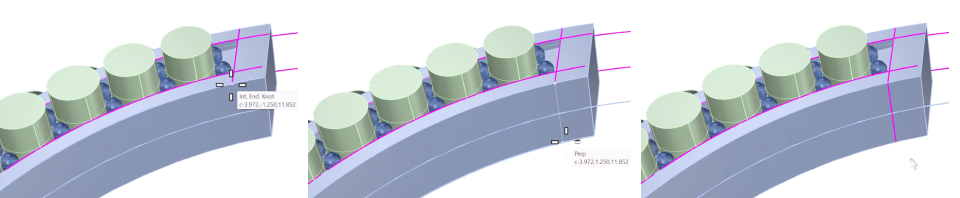
Mirror the Line
Use the “Mirror” command to reflect it to the right side. Type 0 to set the mirror center, hold Shift and click on the top.
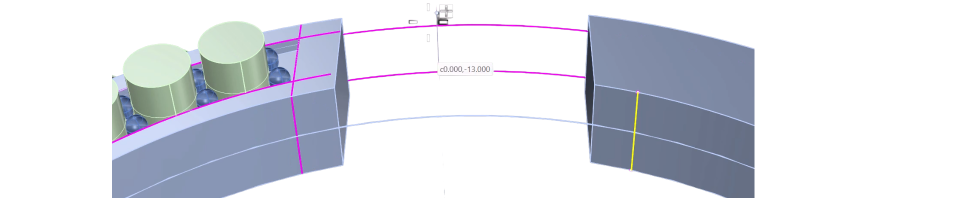
Then hide the lower circle with the hide command to keep the view clean.
Extrude the First Arm
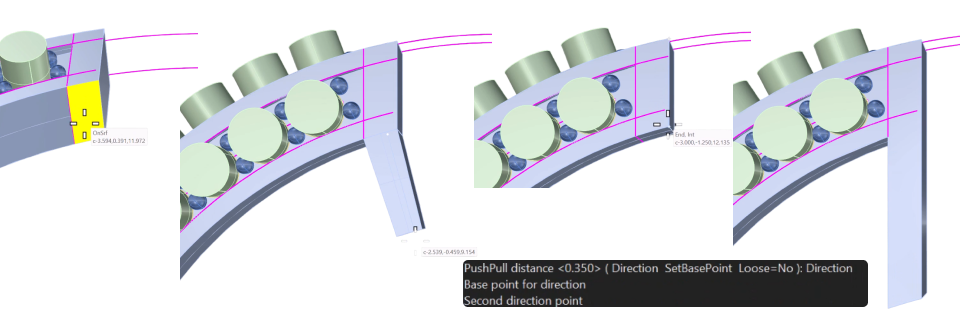
Go to the “Solid” tab and click on “Push and Pull”.

Select the first surface — notice that it creates a perpendicular solid in the wrong direction.
- In the command bar, select the Direction option.
- Choose two points from the solid’s upper edge to force a vertical orientation.
Now the solid is perpendicular. Extend the arm, making it long enough to trim later.
Extrude the Second Arm
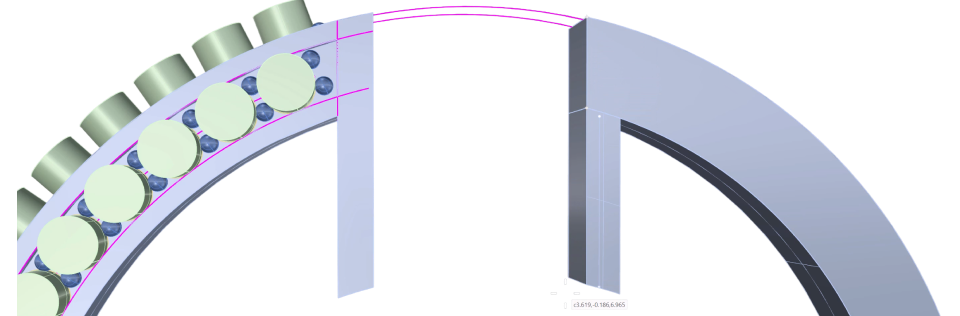
Repeat the procedure on the right side: “Push and Pull”, Direction, two points from the solid’s upper edge, and extend the arm.
Video Lesson
Next Step
With both arms in place, we’ll add the hinge and prepare the curves for the last channels.
Almost there — you still have some lessons to complete. Jump to the next one →
Impersonating — progress and reviews are disabled.
Course completed
You've completed Precision & Detail Design 🎉
Great work. Get your certificate of completion and, if you have a minute, let other jewelers know what you thought of the course.