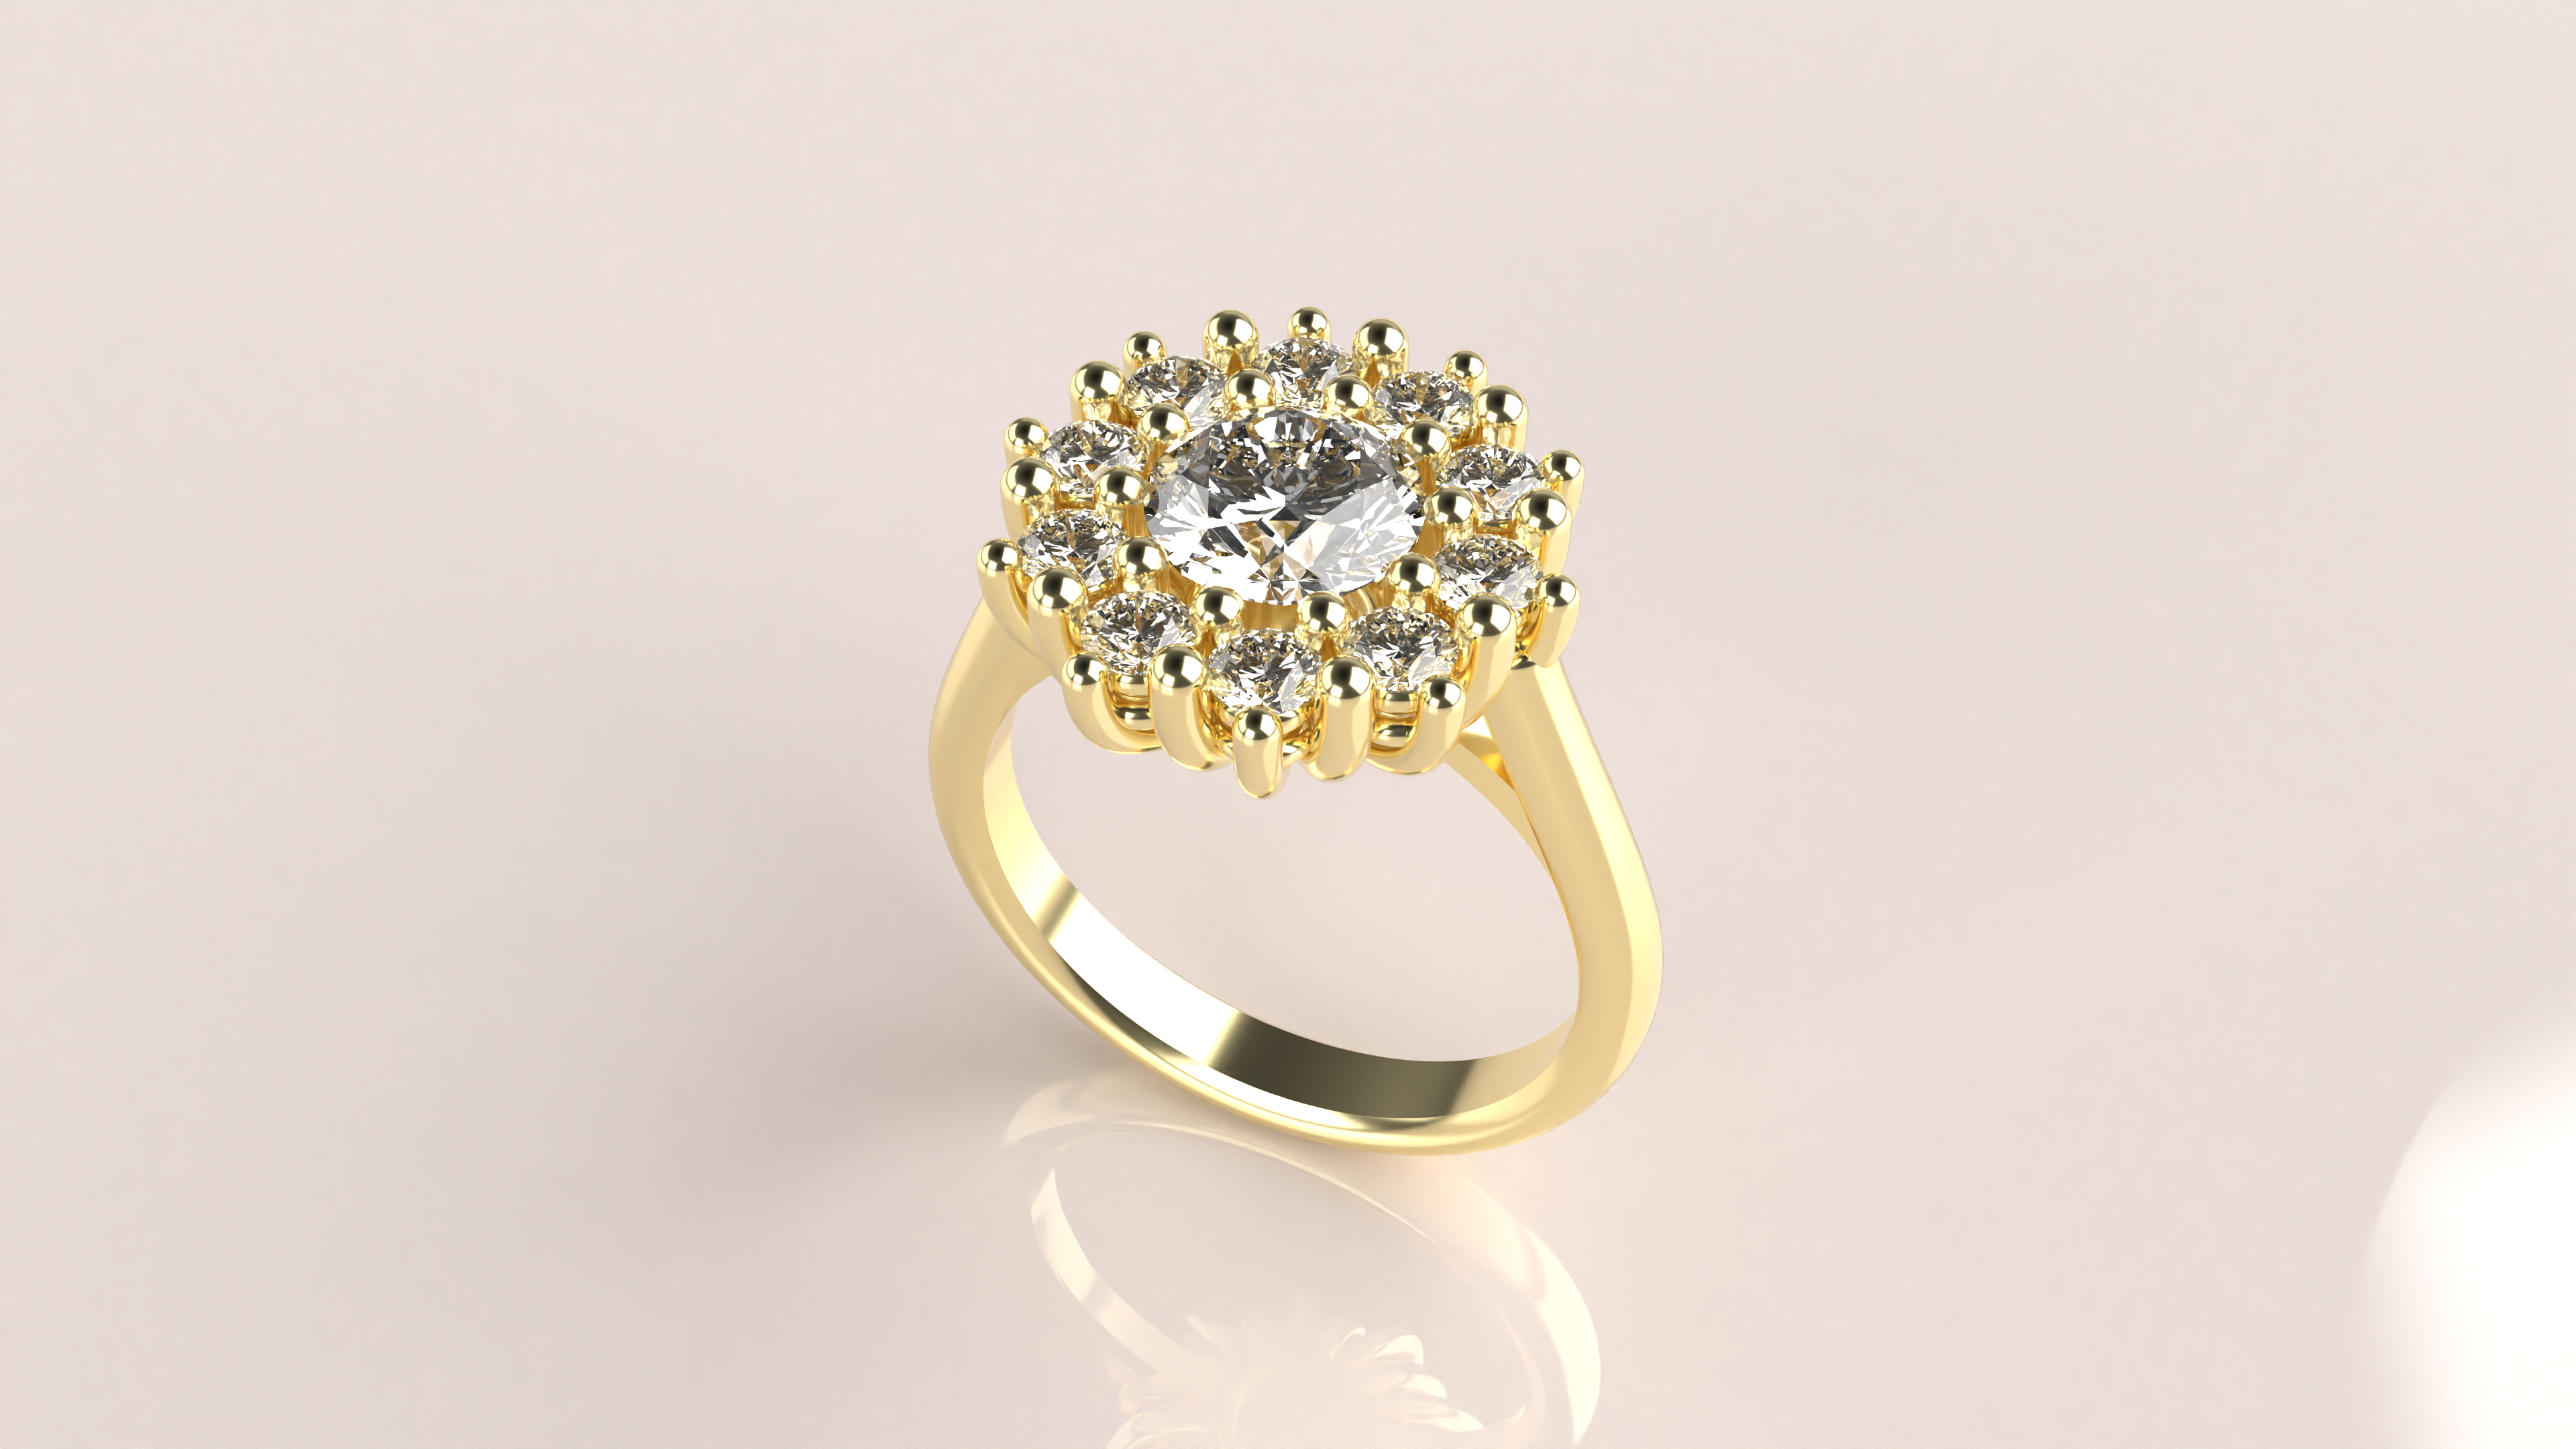
Classic Cluster
Lesson 19 of 34
Overview
Sign in to access this lesson
This lesson is part of Timeless Jewels, which can come bundled with a RhinoArtisan Commercial license subject to current promotions. Log in with your customer account, or get in touch and we'll set you up.
Customers only
Solo para clientes
This lesson is part of Timeless Jewels, which can be included with a RhinoArtisan Commercial license subject to current promotions. If you've already purchased and don't see it in your account, get in touch.
What You’ll Learn
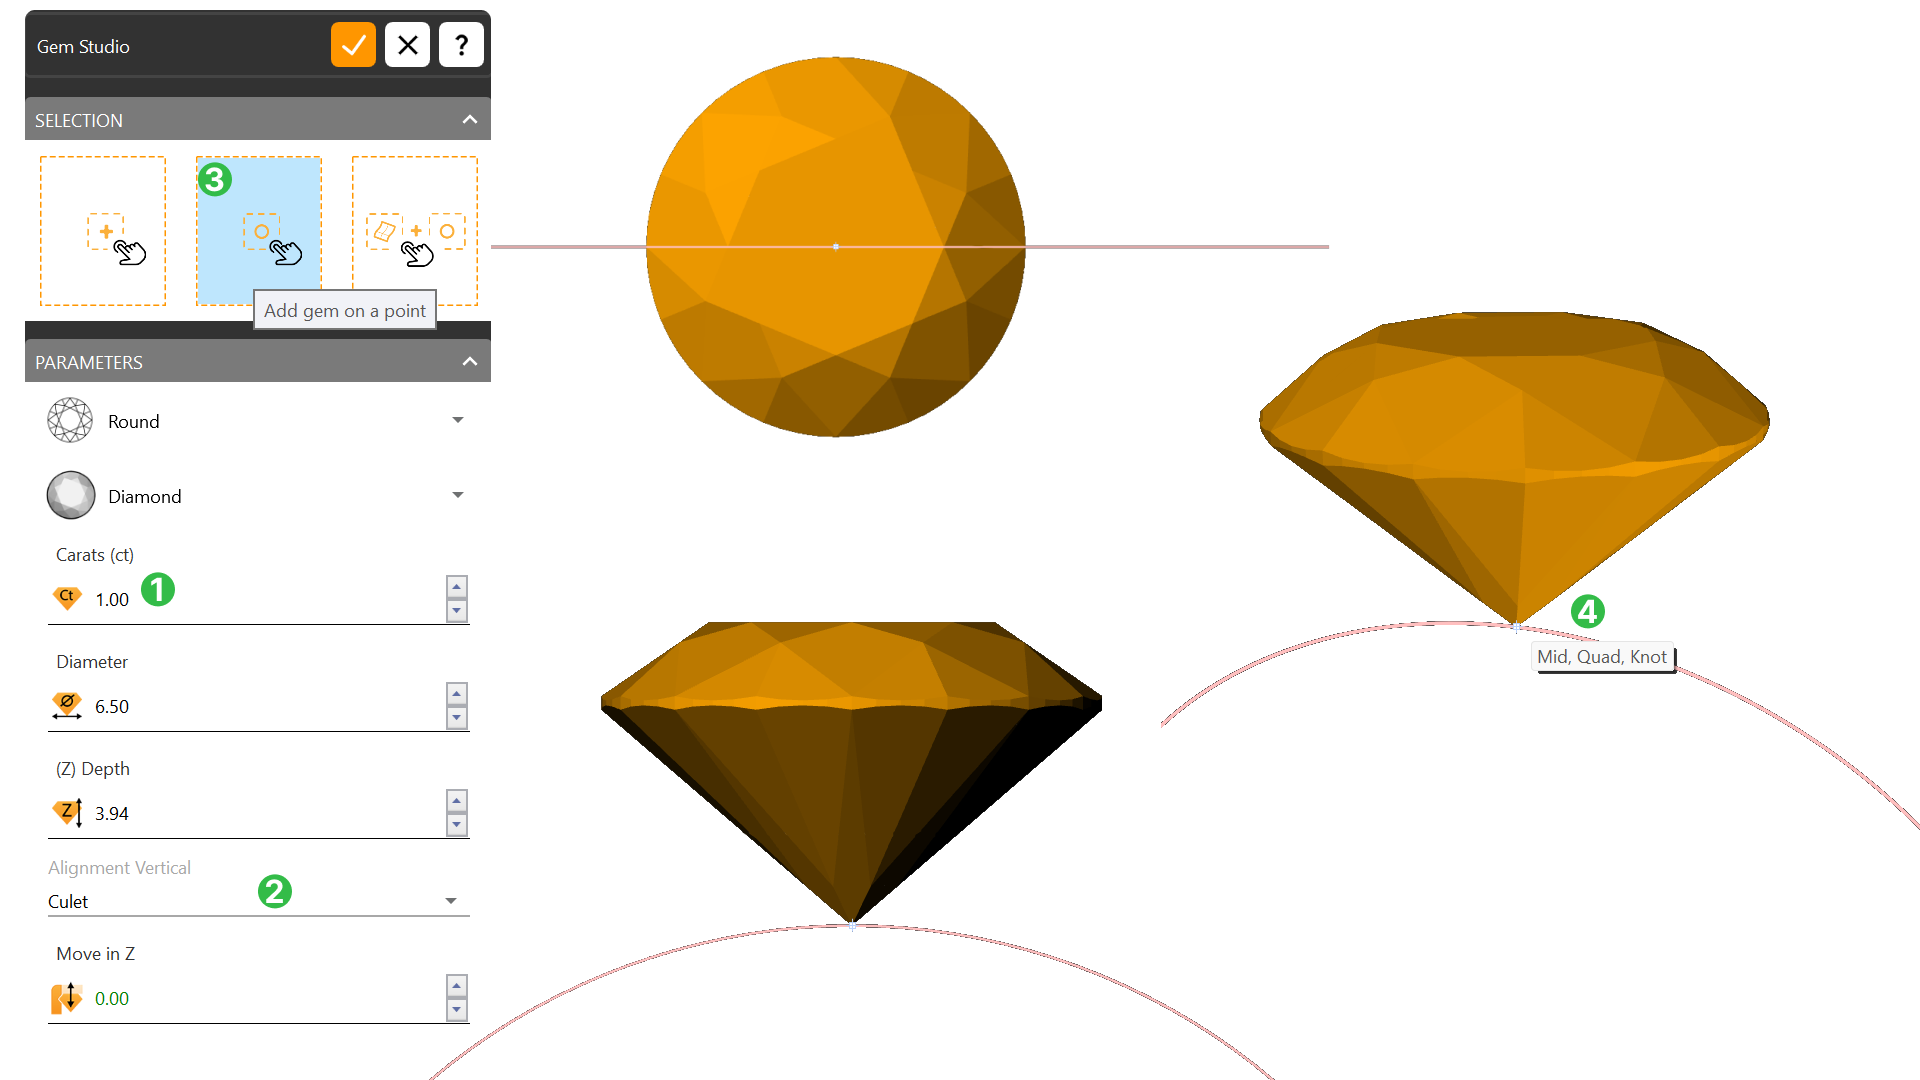
Create the Centerpiece
Start by crafting the cluster centerpiece—a brilliant 1-carat diamond. Set your scene with a clear visual by switching to the Shaded Display Mode for better clarity.
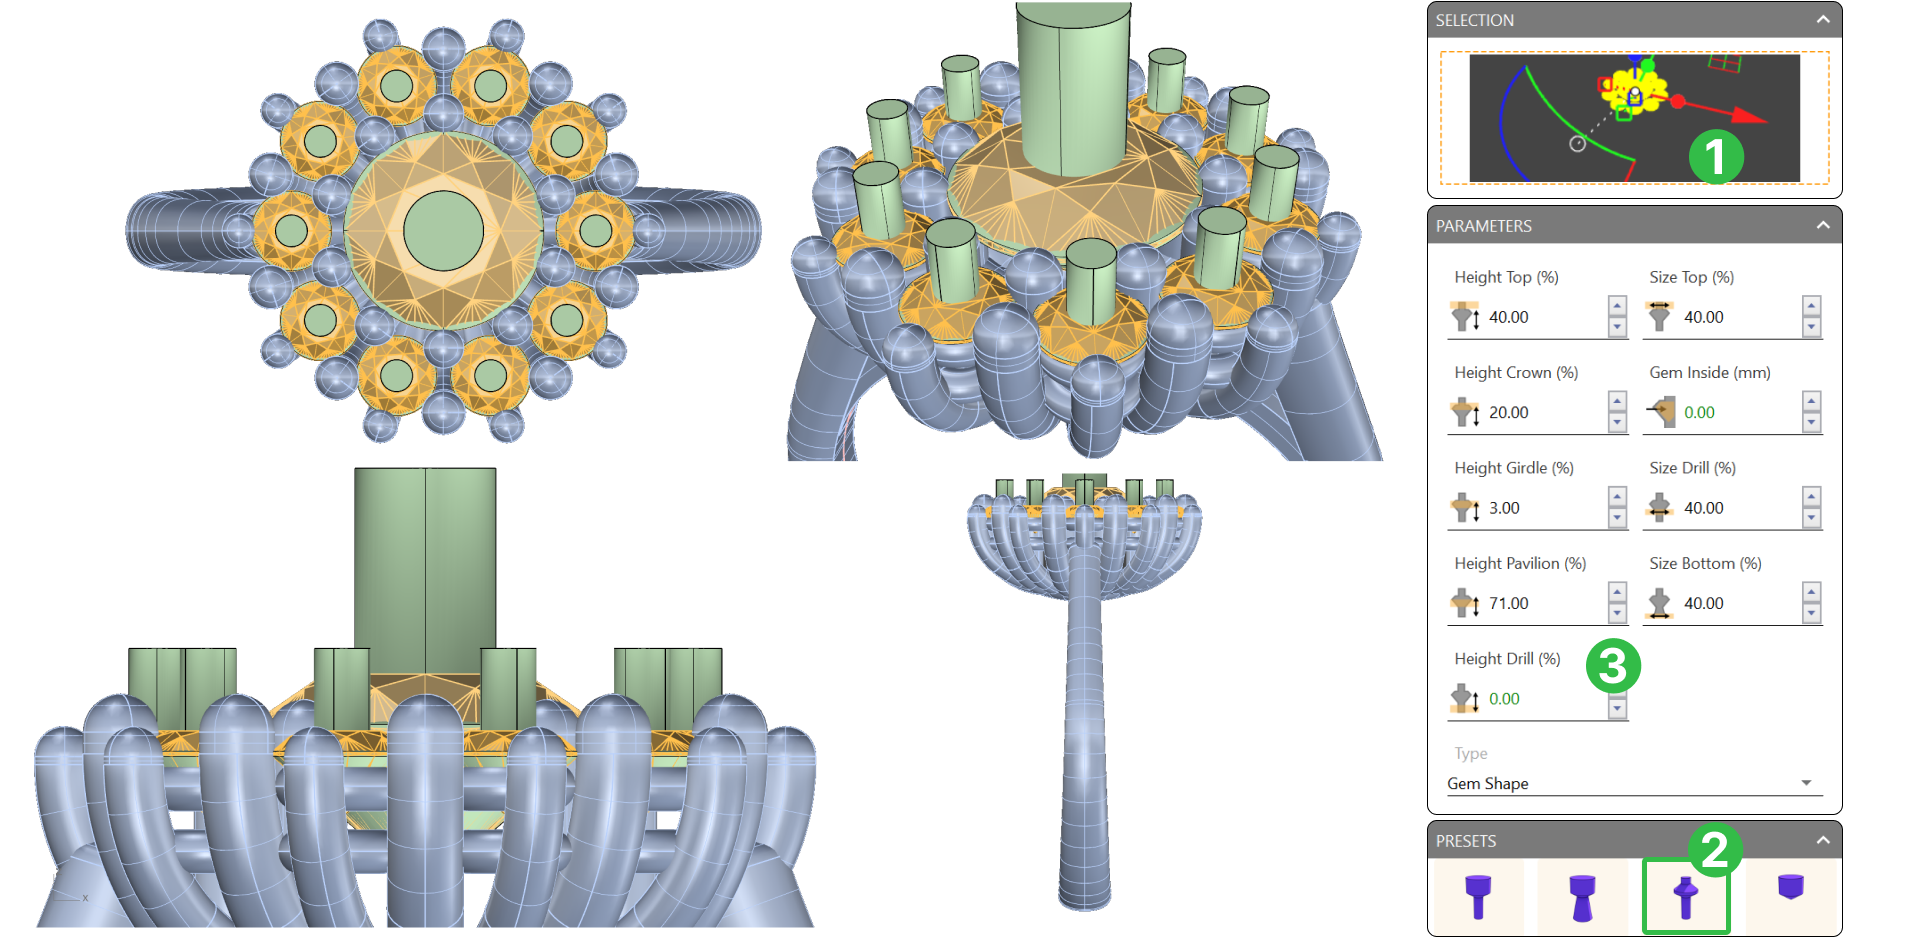
Configuring Cluster
Set up gem parameters like spacing and positioning to create a balanced, classic look around the central gemstone.
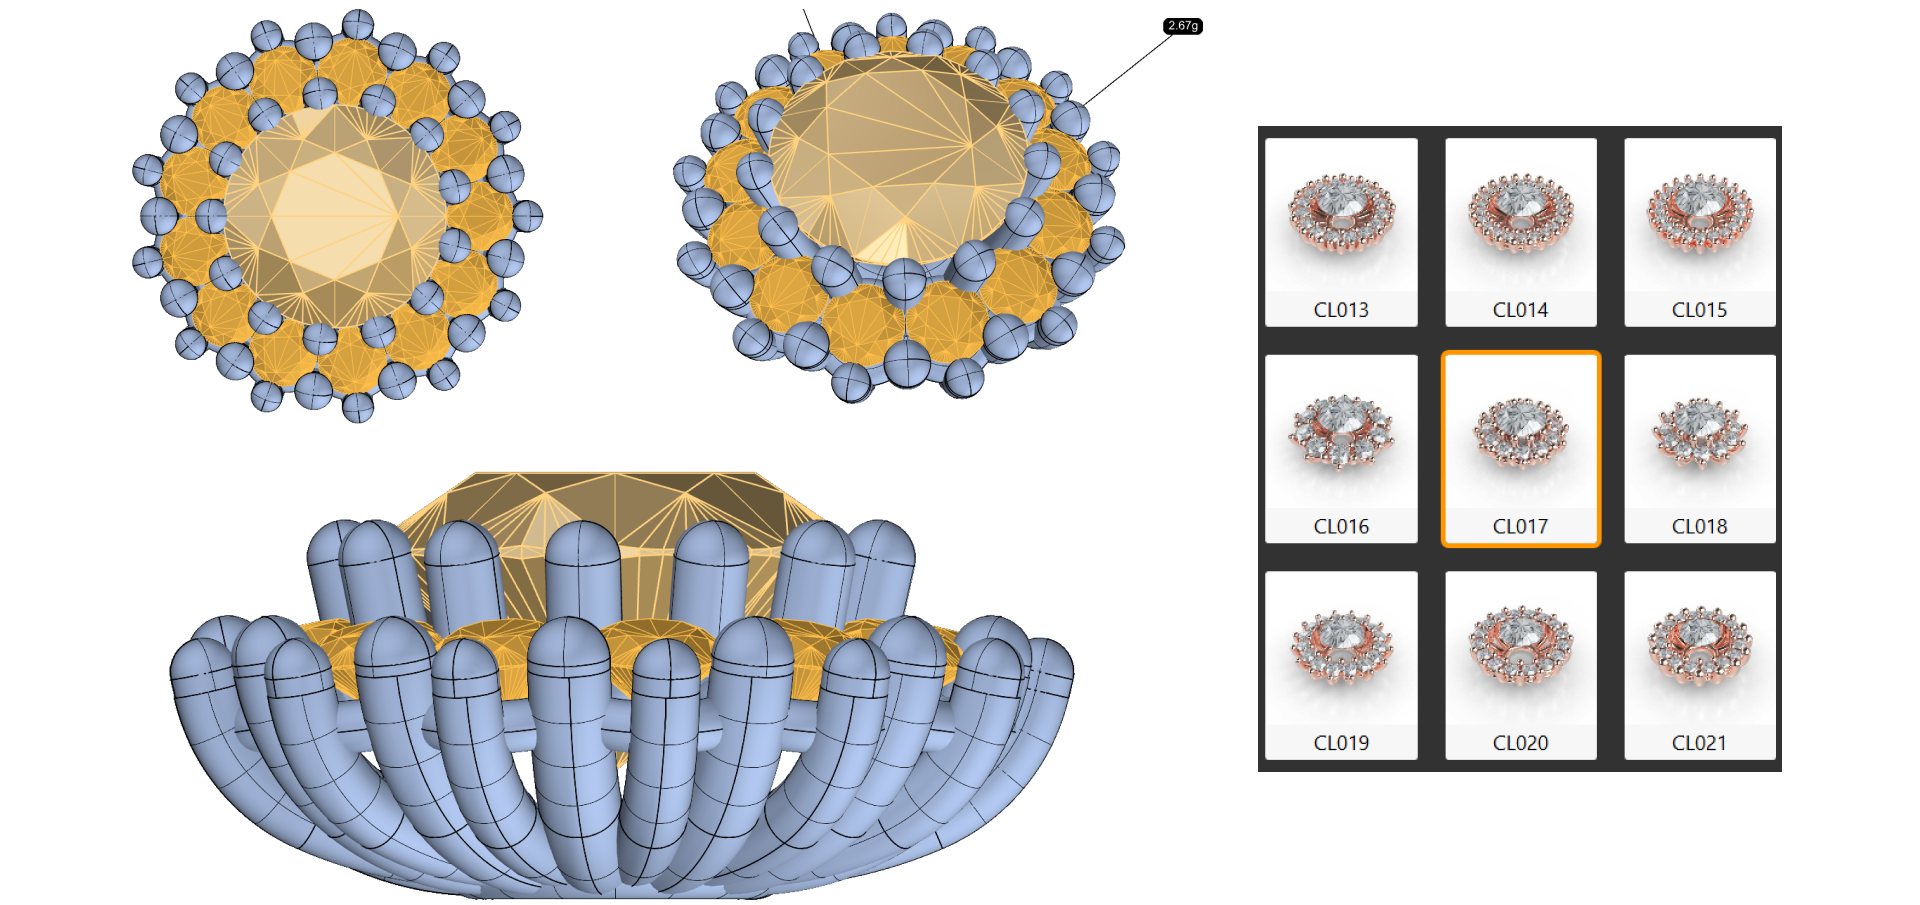
Configure the double-layered Gem Rail to hold gemstones securely and add style, adjusting dimensions for top and bottom rails.
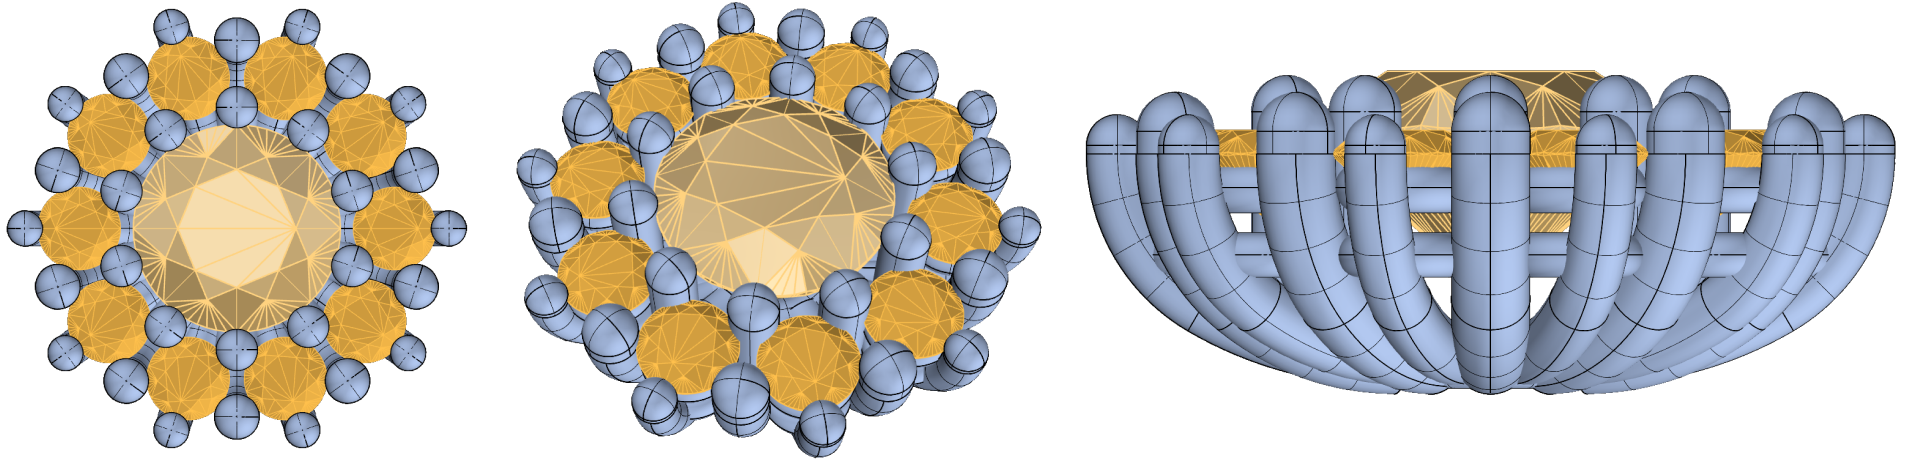
Configuring the Cluster Prongs
Adjust prong settings to securely hold gemstones in place while keeping alignment. Fine-tune parameters for size, spacing, and extension.
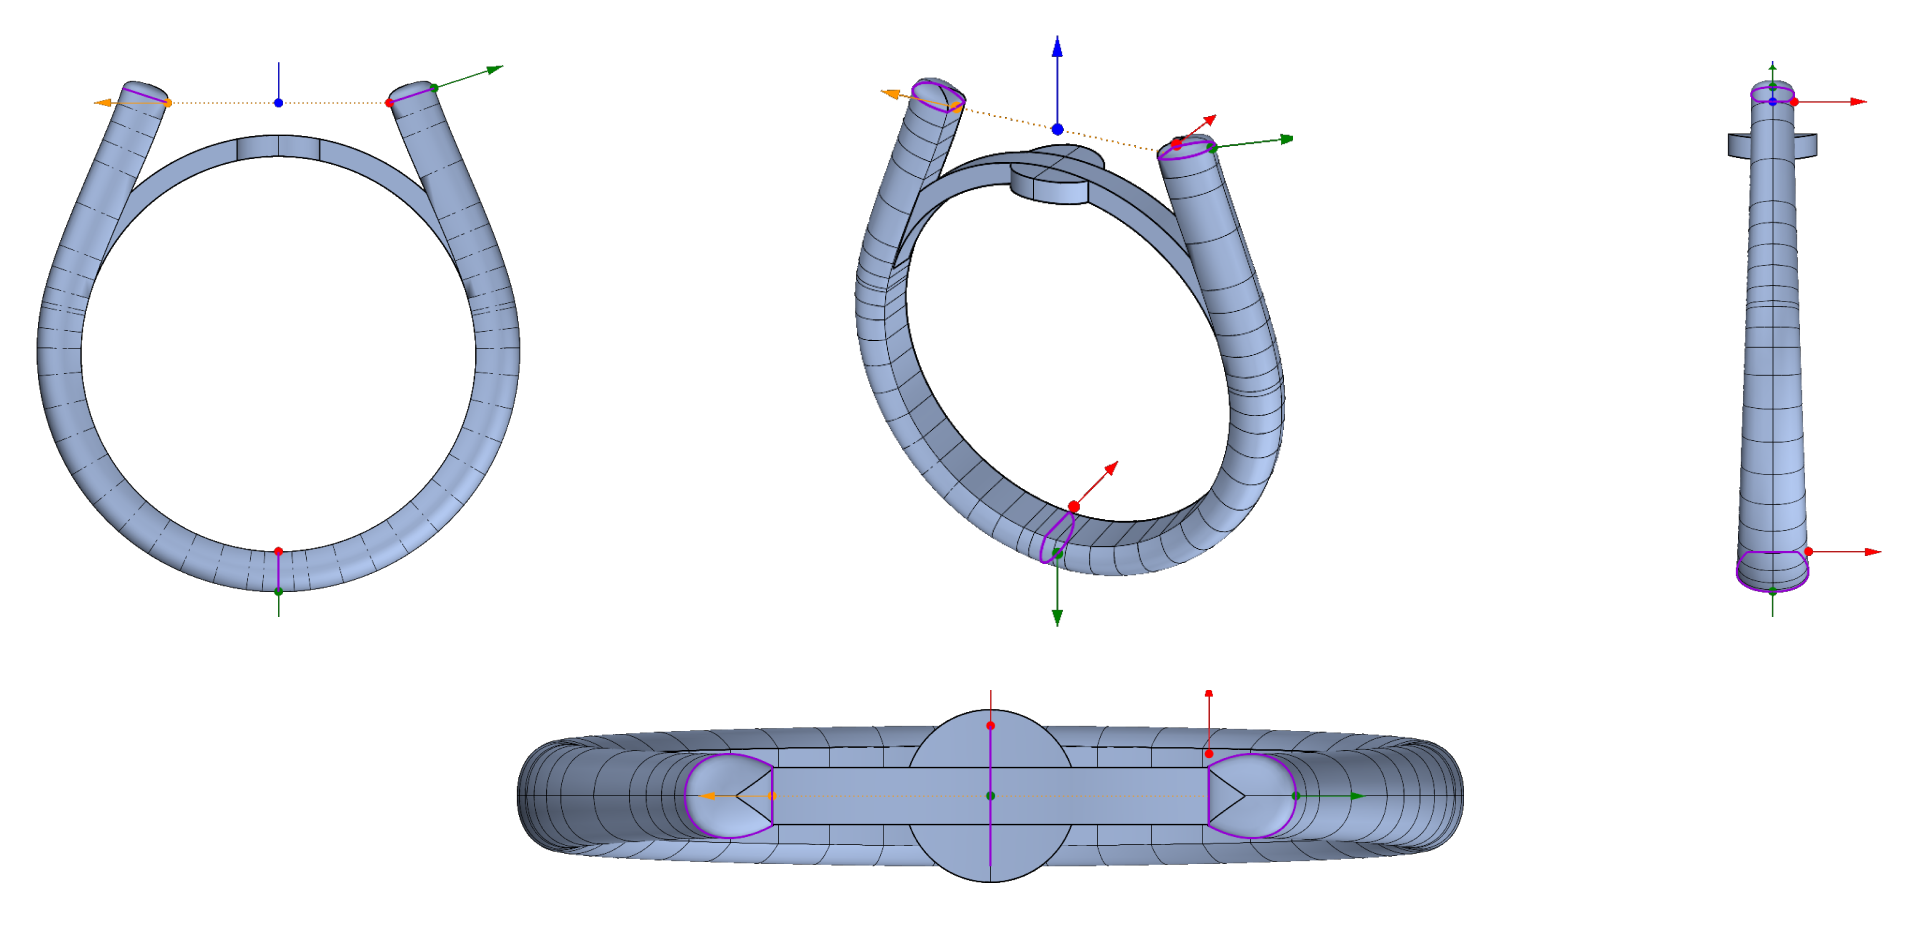
Configuring the Shank – The Ring Band
Use the Cathedral Shank style to elevate the central gem. Adjust dimensions and angle for a balanced, elegant ring band.
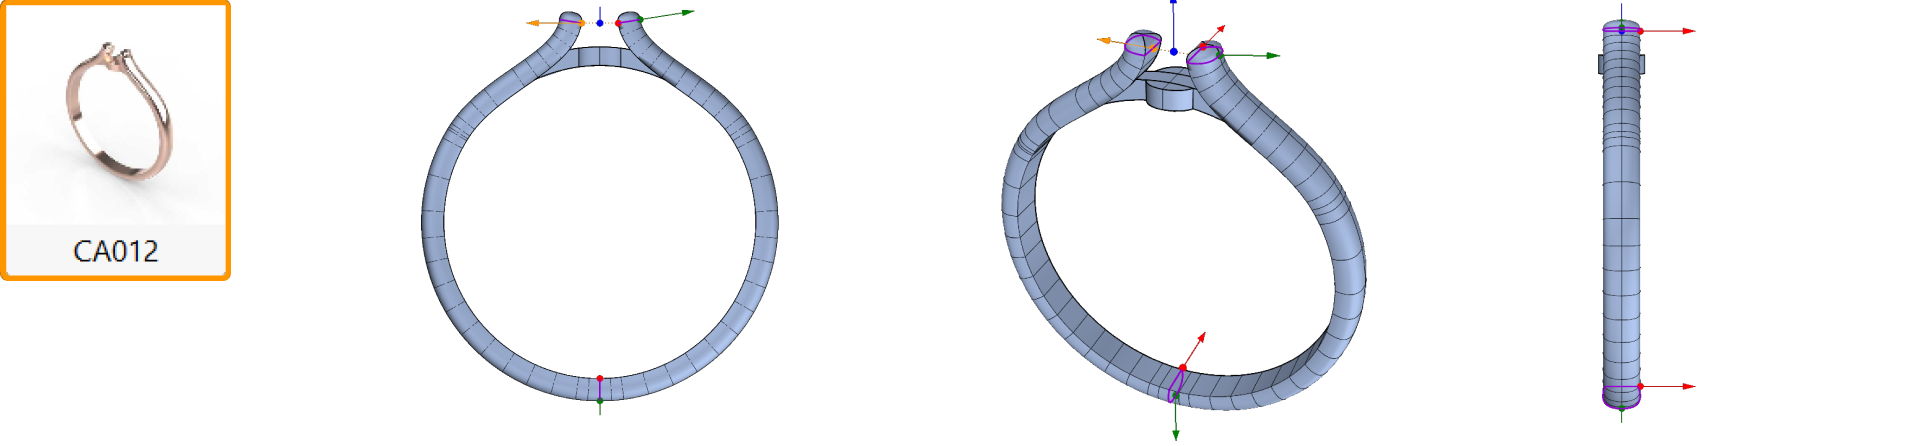
Adding and Adjusting the Bridge
Add a bridge to stabilize the cluster at the base, ensuring a secure, balanced design.
Cutters: Prepare the Gems and Metal
Use Cutters to remove metal that interferes with the gems, allowing light to interact properly.
Final Steps Rendering
Review all elements and render the final Classic Cluster Ring design, ensuring each part fits perfectly.
What You’ll Need
You’ll only need RhinoArtisan installed. This course guides you step-by-step to master each design element with confidence.