Halo Pendant
Lesson 5 of 34
Create the Scene
Sign in to access this lesson
This lesson is part of Timeless Jewels, which can come bundled with a RhinoArtisan Commercial license subject to current promotions. Log in with your customer account, or get in touch and we'll set you up.
Customers only
Solo para clientes
This lesson is part of Timeless Jewels, which can be included with a RhinoArtisan Commercial license subject to current promotions. If you've already purchased and don't see it in your account, get in touch.
Objective: Create the scene for the final render.
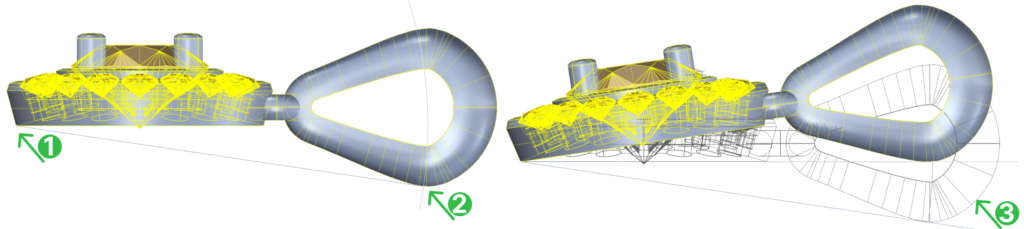
Step 1: Rotate command
Select the model, go to the Transform tab, and use the Rotate command.

Step 2: Pose
In the Right View, choose the lowest point on the halo as the first point (1) and the lowest tangent point on the bail as the second (2). Hold “Shift” and click in the viewport (3) to pose the pendant.
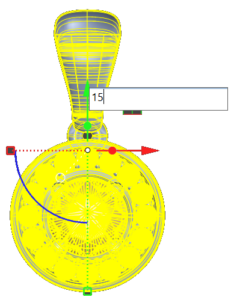
Step 3: Polar Array
In Top View, move all elements up by 15 mm.
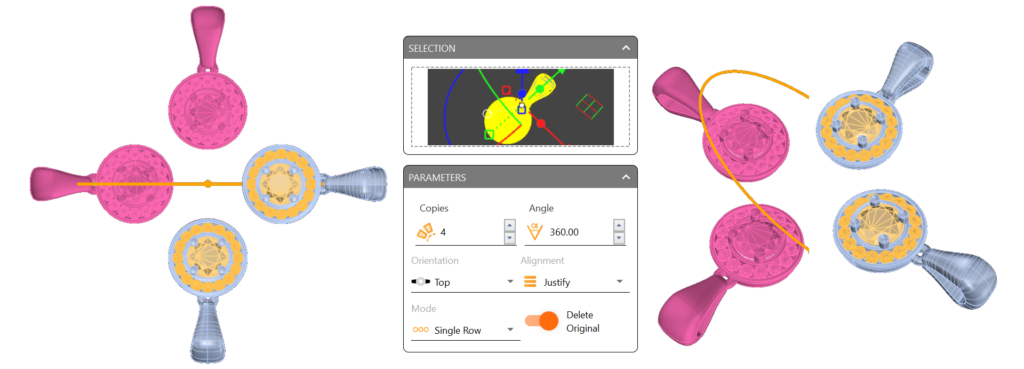
In the Transform tab Use the Quick Array Polar

- Set Orientation to Top
- Set the copies to 4.
Video Lesson
Next Lesson
In the next lesson, we’ll finalize the piece with rendering and material selection.