Halo Cathedral
Lesson 11 of 34
Creating the Halo Setting
Sign in to access this lesson
This lesson is part of Timeless Jewels, which can come bundled with a RhinoArtisan Commercial license subject to current promotions. Log in with your customer account, or get in touch and we'll set you up.
Customers only
Solo para clientes
This lesson is part of Timeless Jewels, which can be included with a RhinoArtisan Commercial license subject to current promotions. If you've already purchased and don't see it in your account, get in touch.
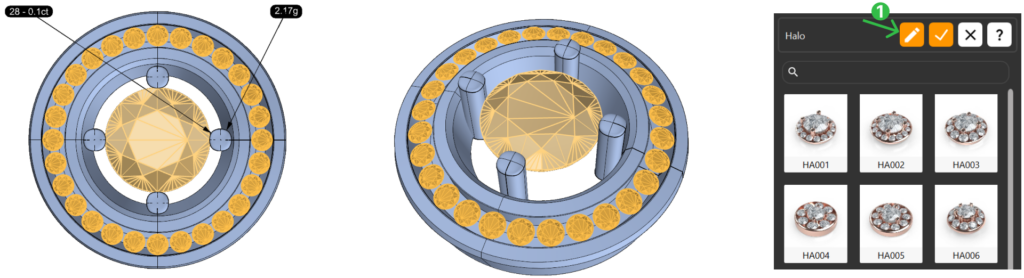
Objective: Configure a halo setting around the center diamond to add elegance and detail to the design.
Step 1: Go to the Diamonds tab, select Halo, then click on the Pencil icon (1) to start customizing.
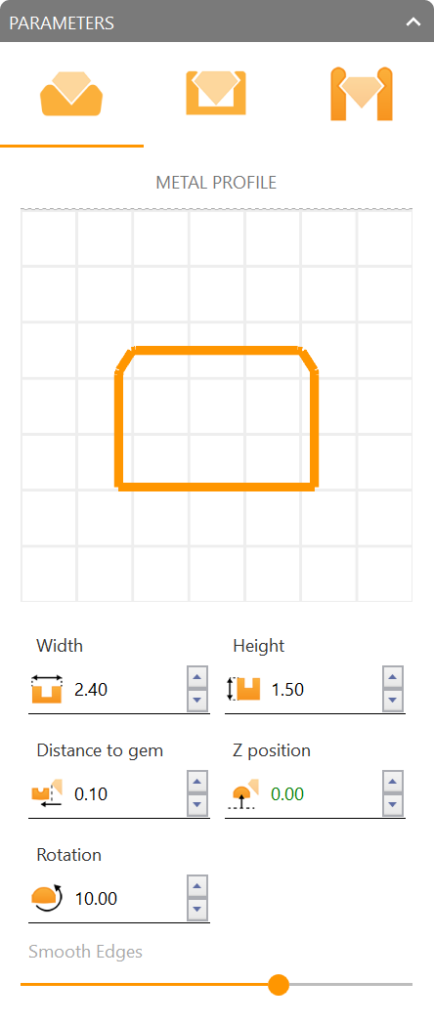
Step 2: Go to the Metal Tab and adjust parameters
- Width: 2.4 mm
- Height: 1.5 mm
- Distance to Gem: 0.1 mm
- Z Position: 0
- Rotation: 10º
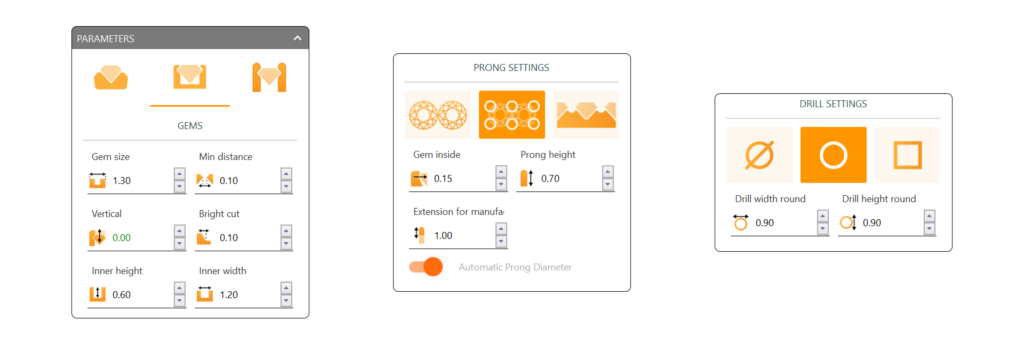
Step 3: Go to the Gems Tab
- Gem Size: 1.3 mm
- Minimum Distance: 0.1 mm
- Vertical: 0 mm
- Bright Cut: 0.1 mm
- Inner Height: 0.6 mm
- Inner Width: 1.2 mm
Step 4: Prong Settings
- Select the second option
- Gem Inside: 0.15 mm
- Prong Height: 0.7 mm
- Enable Drill Holes if desired, with Width and Height set to 0.9mm.
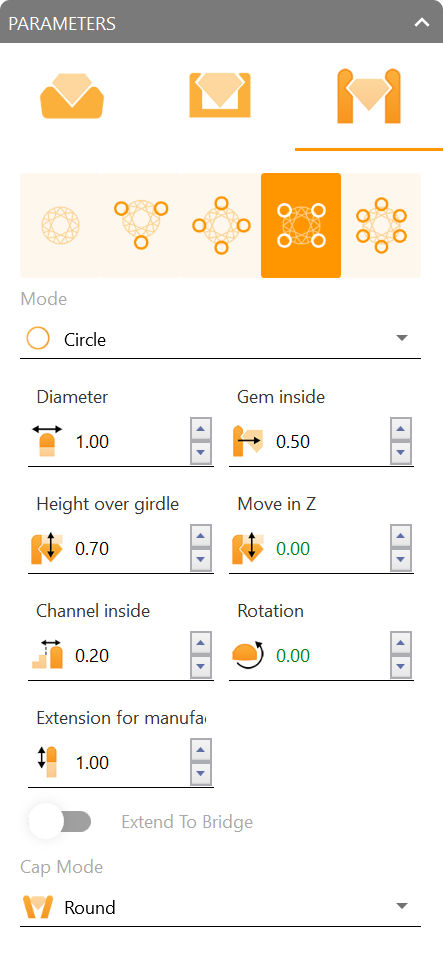
Step 5: Adjust Parameters for the Main Gem Tab
- Select the 4th option
- Mode: Circle
- Gem Inside: 0.5 mm
- Height Over: 0.7 mm
- Channel Inside: 0.2 mm
Video Lesson
Next Step
We’ll now proceed to rendering to bring the final design to life visually.