Cabochon Ring
Lesson 30 of 34
Creating and Positioning the Cabochon
Sign in to access this lesson
This lesson is part of Timeless Jewels, which can come bundled with a RhinoArtisan Commercial license subject to current promotions. Log in with your customer account, or get in touch and we'll set you up.
Customers only
Solo para clientes
This lesson is part of Timeless Jewels, which can be included with a RhinoArtisan Commercial license subject to current promotions. If you've already purchased and don't see it in your account, get in touch.
Objective: Learn to create an oval cabochon gemstone and position it precisely in the center of the shank.
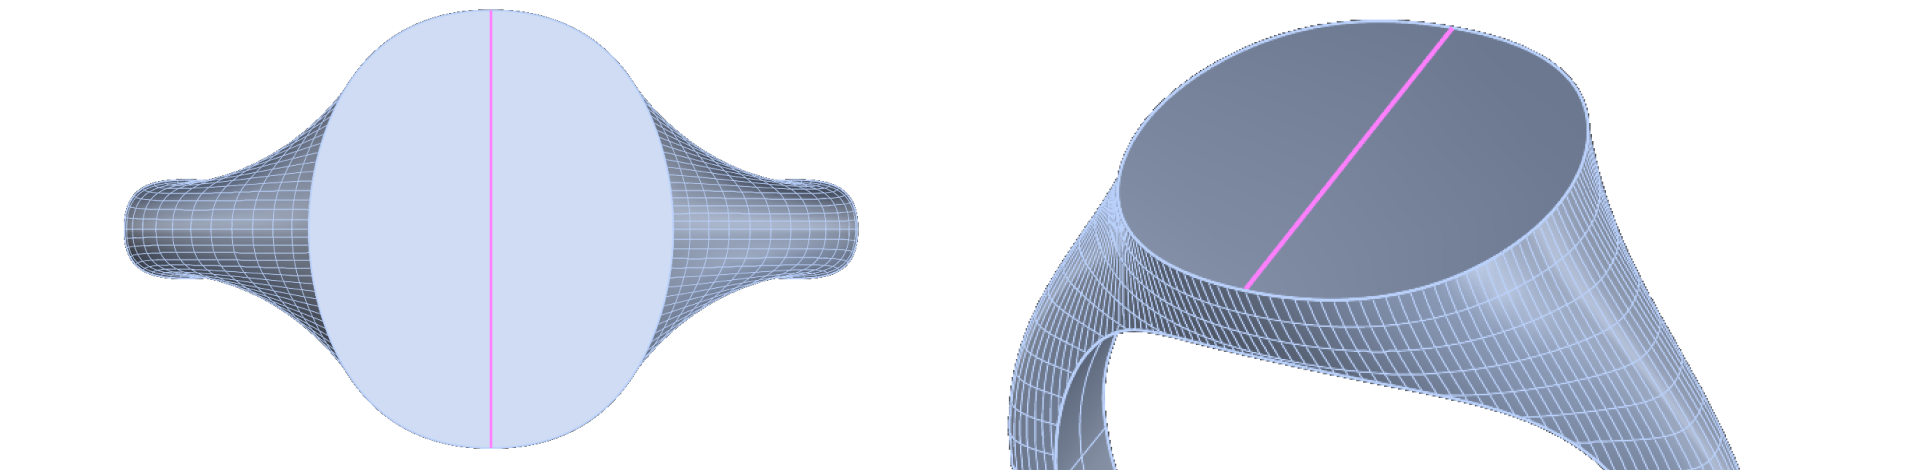
Create Alignment Line:
- Go to the Curve tab (1) and create a line (2) that runs across the top of the ring. This will help with positioning.

- Activate Osnap and select options to align it accurately.

- Create the line.
Create the Cabochon:
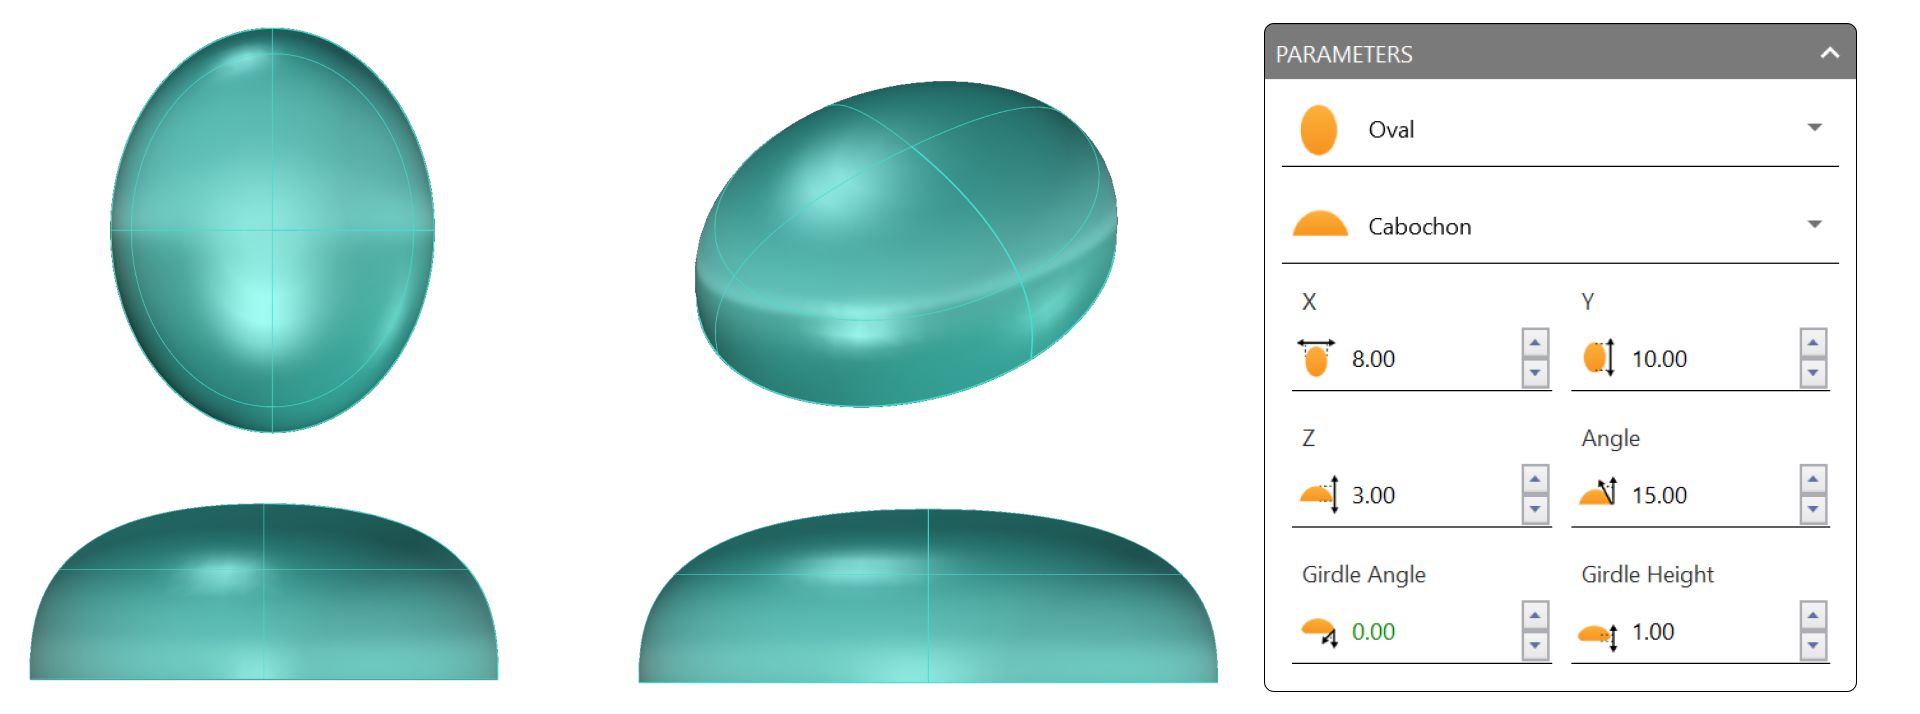
Go to the Diamonds tab (1) and select Cabochon (2).

- Set the Mode to Oval.
- Set X to 8 mm, Y to 10 mm, Z to 3 mm.
- Set the Girdle Angle to 0.
Position the Cabochon:
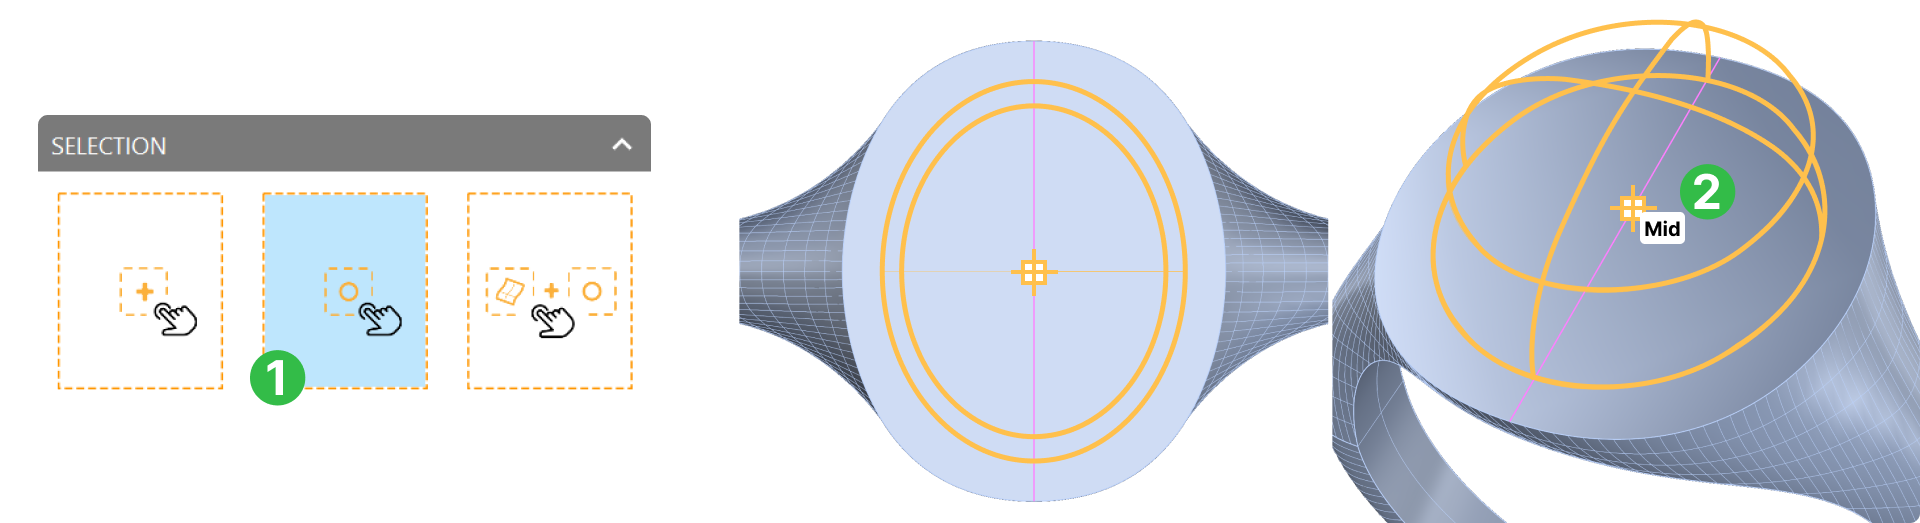
- Use the line created earlier to find the midpoint and place the cabochon in the center of the shank.
Video Lesson: In this video, we’ll use the Cabochon command to create a custom-sized cabochon and align it with the shank, ensuring it fits perfectly.
Next Step: With the cabochon positioned, we’ll proceed to fine-tune the fit by offsetting the surface in the next lesson.