Solitaire Ring
Lesson 16 of 34
Adding the Diamond and Creating the Basket
Sign in to access this lesson
This lesson is part of Timeless Jewels, which can come bundled with a RhinoArtisan Commercial license subject to current promotions. Log in with your customer account, or get in touch and we'll set you up.
Customers only
Solo para clientes
This lesson is part of Timeless Jewels, which can be included with a RhinoArtisan Commercial license subject to current promotions. If you've already purchased and don't see it in your account, get in touch.
Objective: Add the solitaire diamond and set up a custom basket that will hold the gem securely.
Step 1: In the Diamond tab (1), select Gems Studio (2).

Create a 1-carat diamond and click Add.

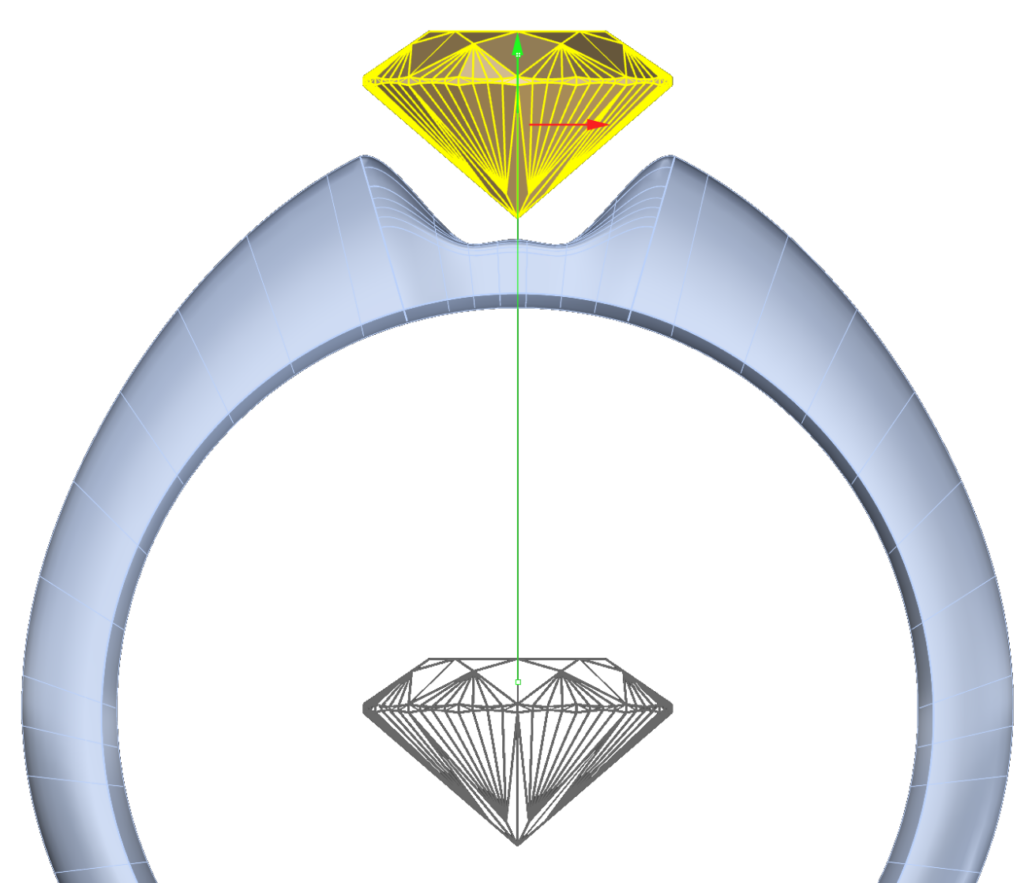
**Step 2:**Using the Gumball in the front view, drag the green arrow to lift the diamond slightly above the ring.
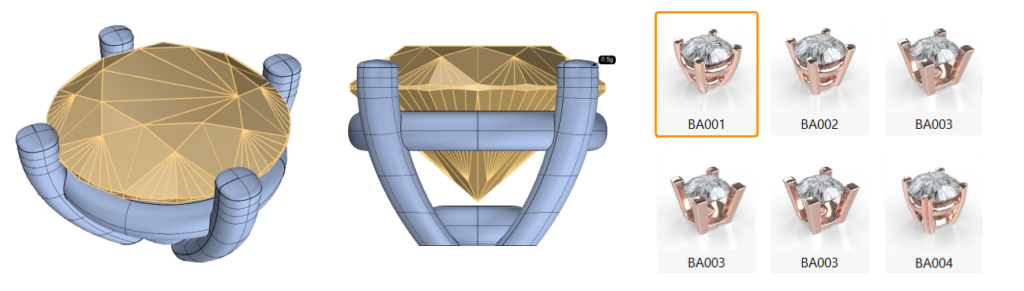
Step 3: Add the Basket: With the diamond selected, click Basket, choose BA001, and click the Pencil button to edit.
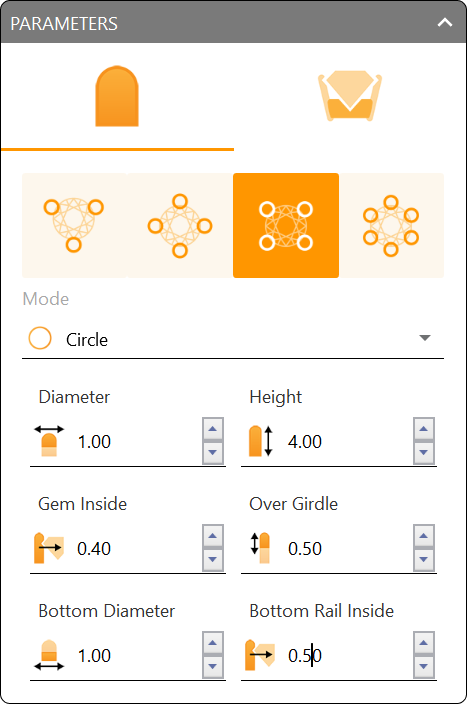
Step 4: Modify Basket Parameters:
- Set Mode to Circle.
- Set Height to 4.0mm.
- Gem Inside: 0.4mm
- Over Girdle: 0.5mm
- Bottom Diameter: 1.0mm
- Bottom Rail Inside: 0.5mm
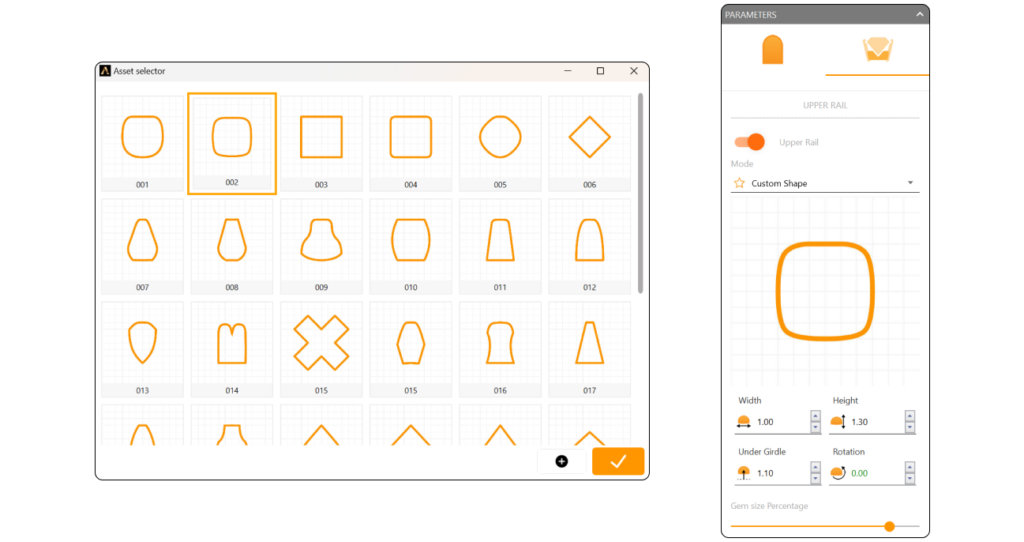
Step 5: Upper Rail Parameters:
- Upper Rail Profile: Profile 002
- Width and Height: 1.0mm
- Height Under Girdle: 1.3mm
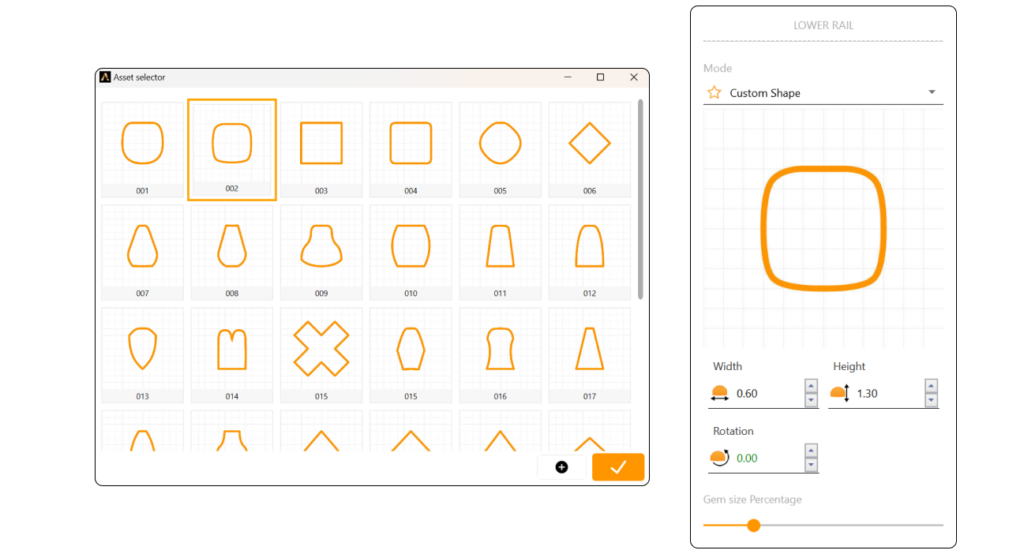
Step 6: Lower Rail Parameters:
- Lower Rail Profile: Profile 002
- Width and Height: 0.6mm
- Height Under Girdle: 1.3mm
Step 7: Click Confirm Changes to apply basket settings.
Step 8: Use the pan, zoom, and rotate tools to fine-tune the basket’s position. Use Zoom Extents All to center all views.

Video Lesson
Next Step: In the following lesson, we’ll apply materials and set up the rendering.