Halo Pendant
Lesson 4 of 34
Add Bail
Sign in to access this lesson
This lesson is part of Timeless Jewels, which can come bundled with a RhinoArtisan Commercial license subject to current promotions. Log in with your customer account, or get in touch and we'll set you up.
Customers only
Solo para clientes
This lesson is part of Timeless Jewels, which can be included with a RhinoArtisan Commercial license subject to current promotions. If you've already purchased and don't see it in your account, get in touch.
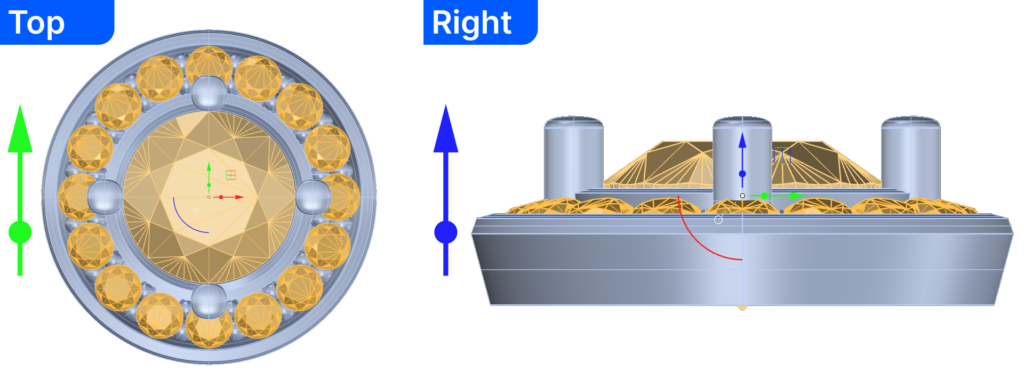
Objective: Position the halo and add a custom bail for pendant attachment.
Step 1: Move the halo
- Select the diamond and halo. Use the gumball
- Click the green arrow, type -6 and press enter.
- Click the blue arrow, type 1.4, and press enter.
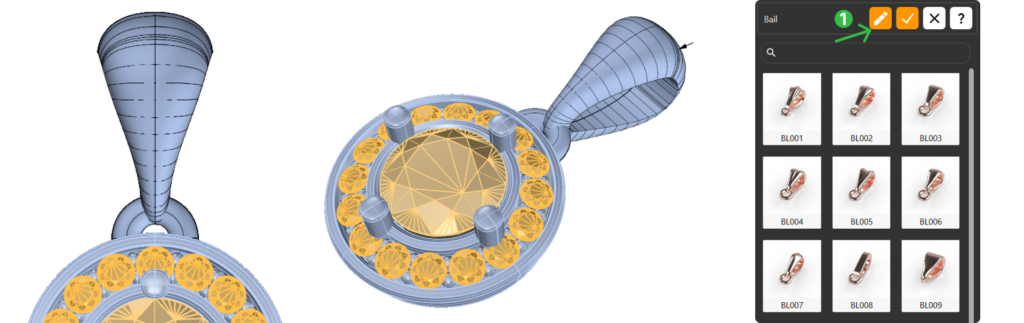
Step 2: Create de bail
In the Components (1) tab, select the Bail command (2).

Click Edit (1):
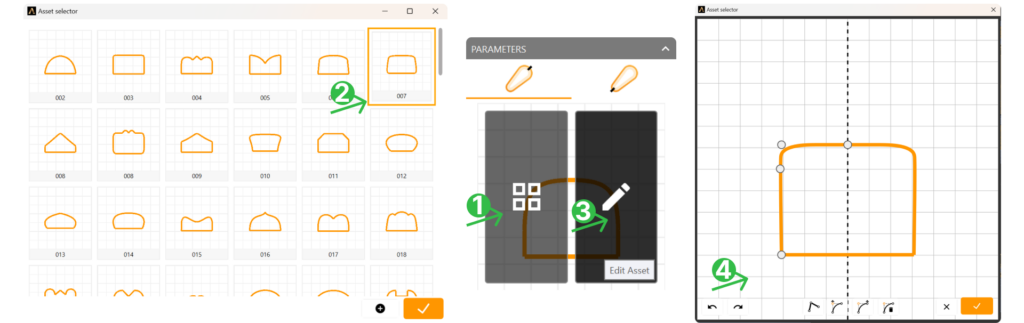
Step 3: Profile
Open the Asset selector panel (1). Select Asset 007 (2) and edit the profile (3), keeping only three left-side points (4).
- Set the Height to 1.5 millimeters.
In the bottom profile tab, select the same asset for the profile (007).
- Set the Width to 1.8 millimeters.
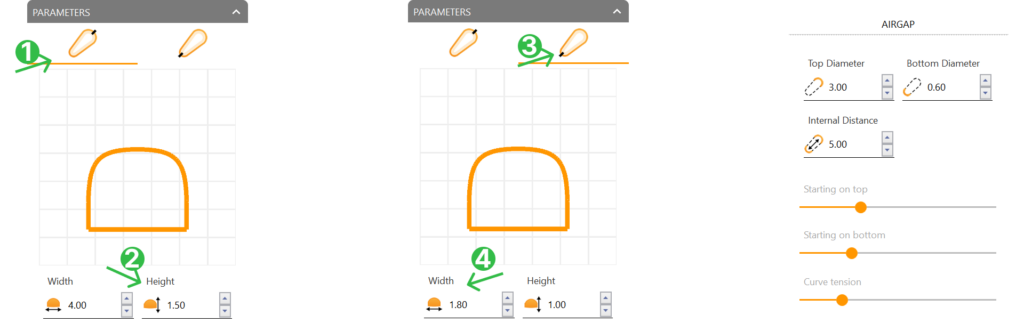
Step 4: Airgap
Configure the airgap settings:
- Bottom Diameter: 0.6 mm
- Internal Distance: 5 mm
- Starting on top to 30%
- Starting on bottom to 25%
- Curve tension to 40%.
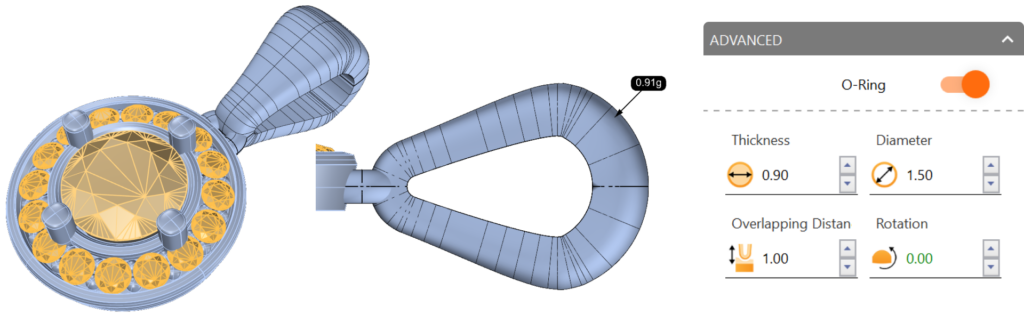
Step 5: O-Ring
Enable the O-Ring, set Thickness to 0.9 mm, and Diameter to 1.5 mm. Confirm changes by clicking “Confirm Changes” in the top-right corner.
Video Lesson
Next Lesson
In the next lesson, we will create a beautiful scene, to get the most out of our model.