Designing the Shank
Step 1: Classic Command
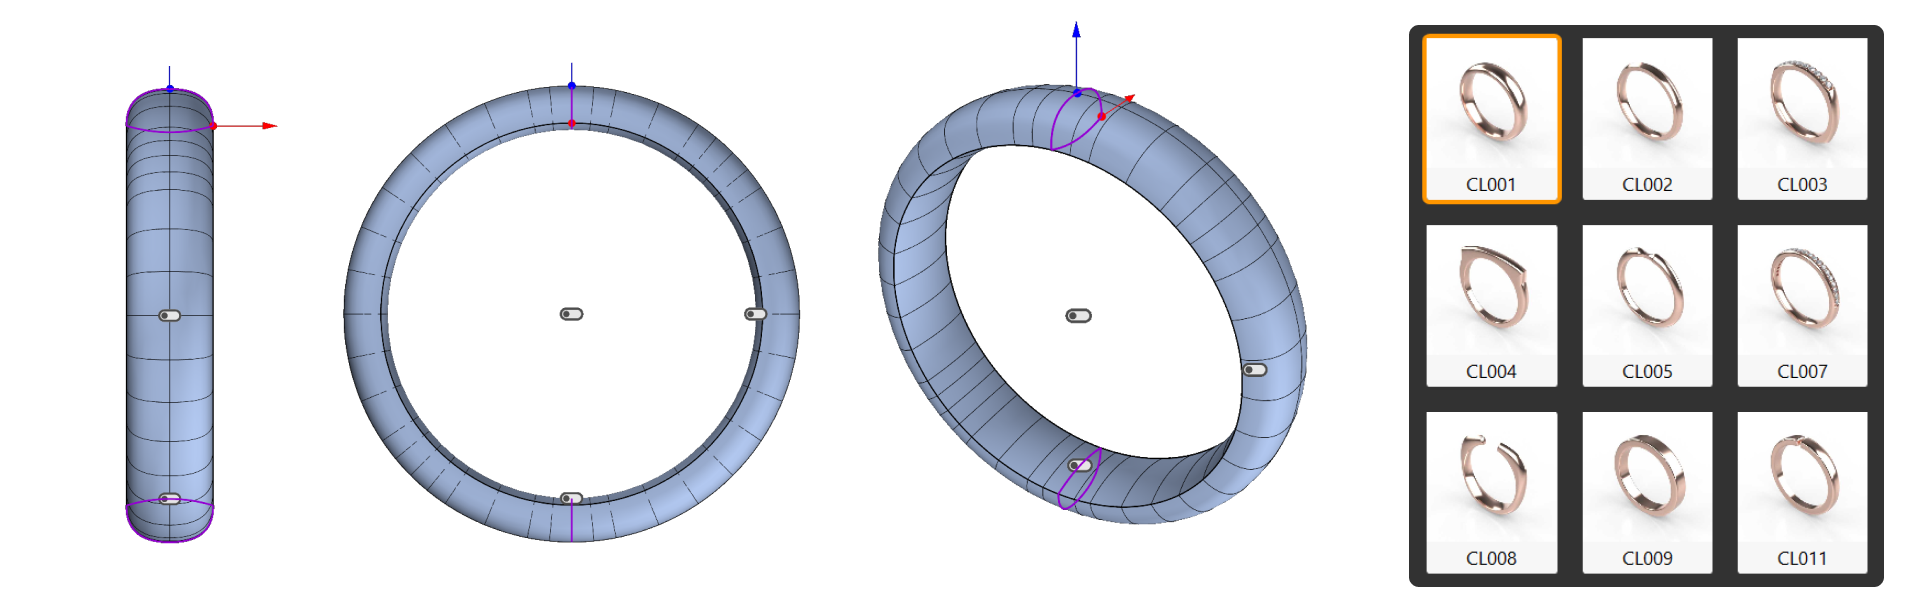
Go to the Shanks tab (1), choose the Classic Shank (2) command.

Step 2: Classic Library
Select element CL01, and click the Pencil button to edit.
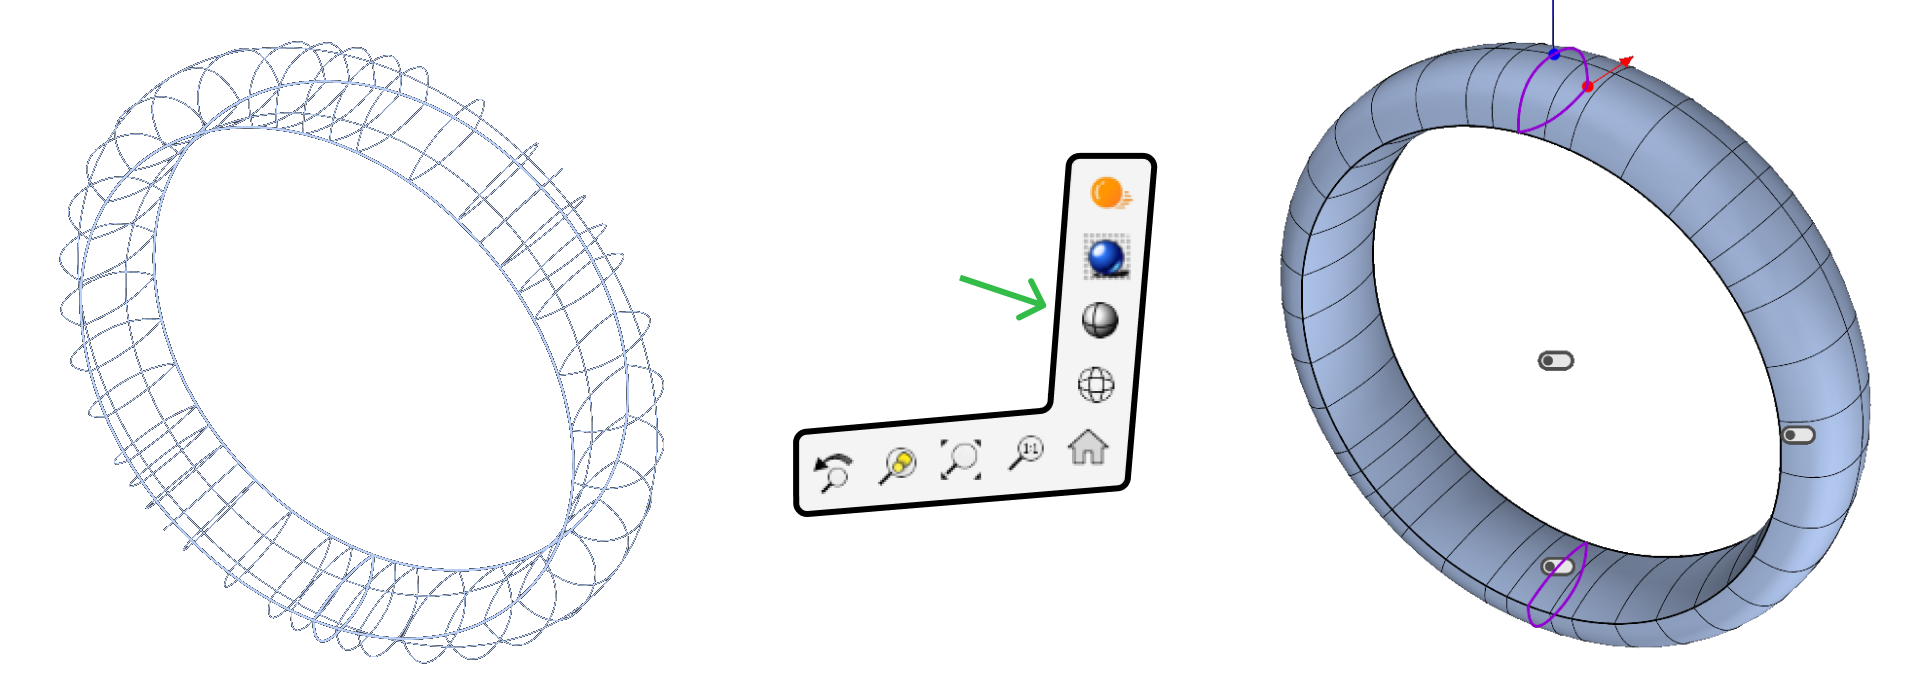
Step 3: Display Mode
Click on the bottom-right of the viewport and switch to Shaded Display Mode to enhance visualization.
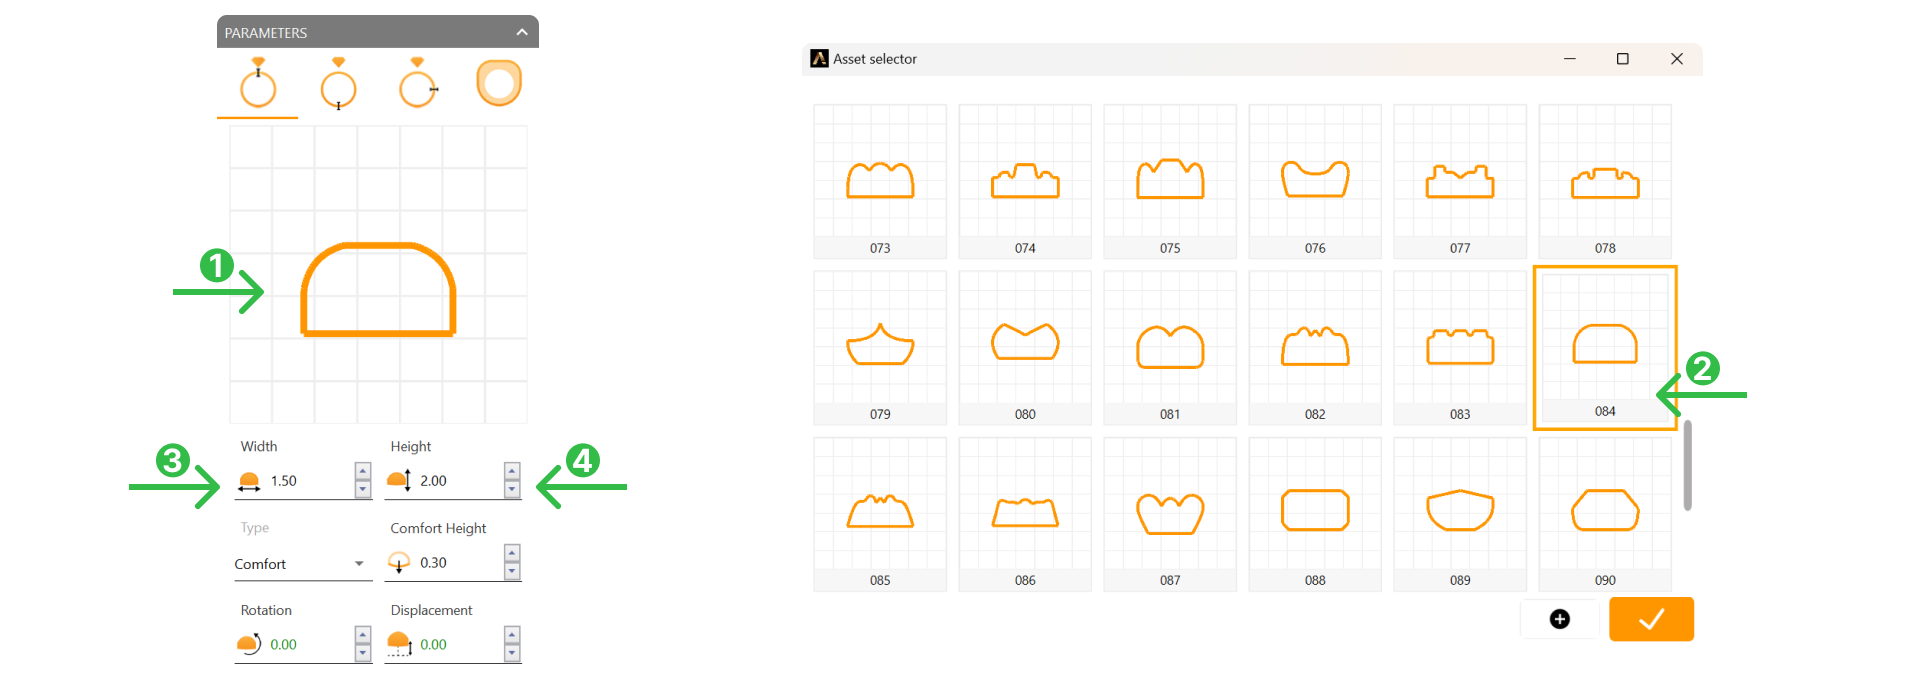
Step 4: Profile Adjustments
- Click on the profile preview (1). In the Asset Selector, select Profile 084 (2).
- Set Width (3) to 1.5mm and Height (4) to 2.0mm.
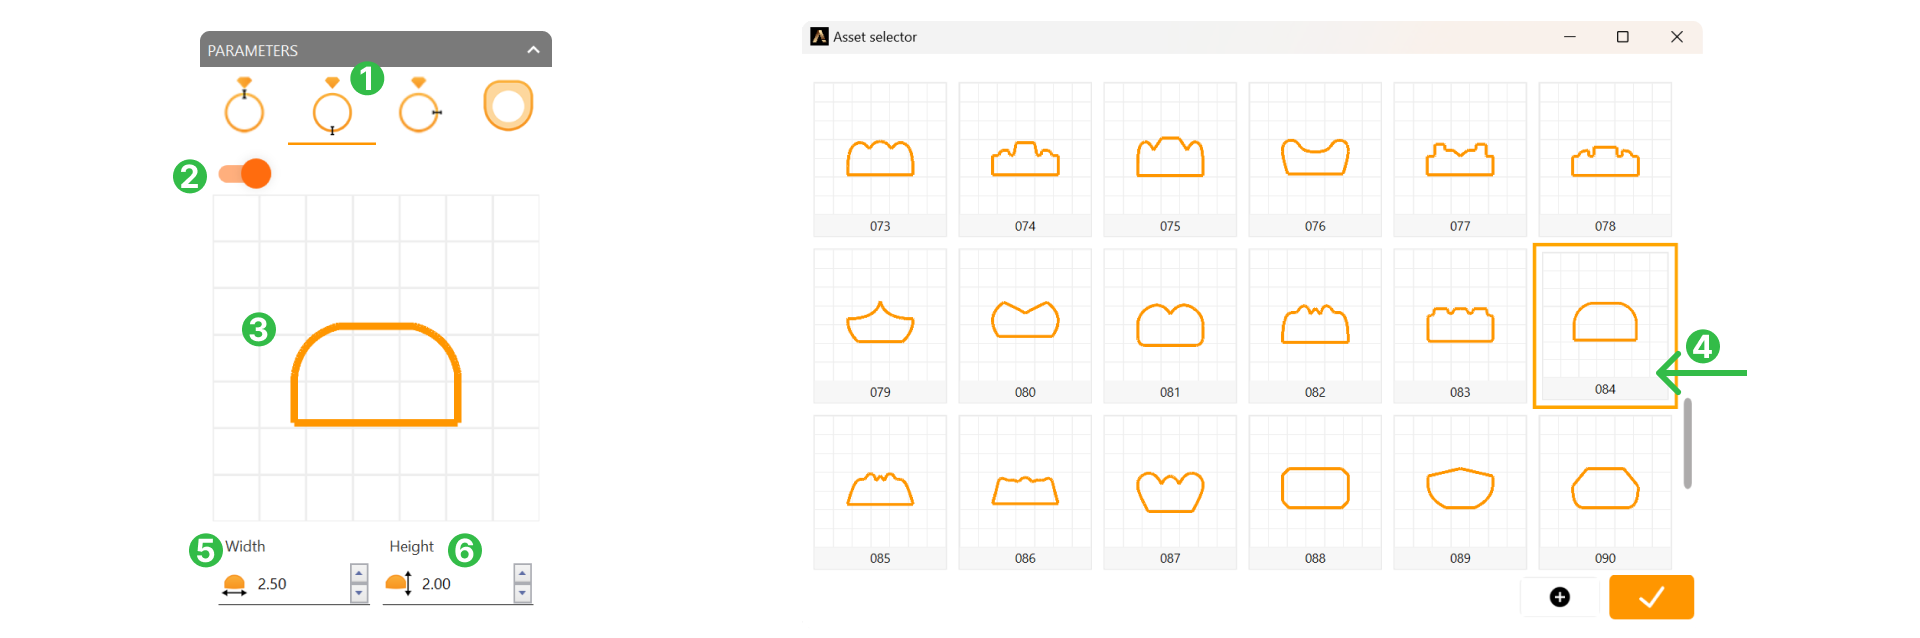
Step 5: Bottom Profile
Go to the Bottom Profile tab (1), turn it on (2), click on the profile preview (3) and select Profile 084 (4) in the Asset Selector. Change the width to 2.5mm (5) and land leave height (6) at 2 mm.
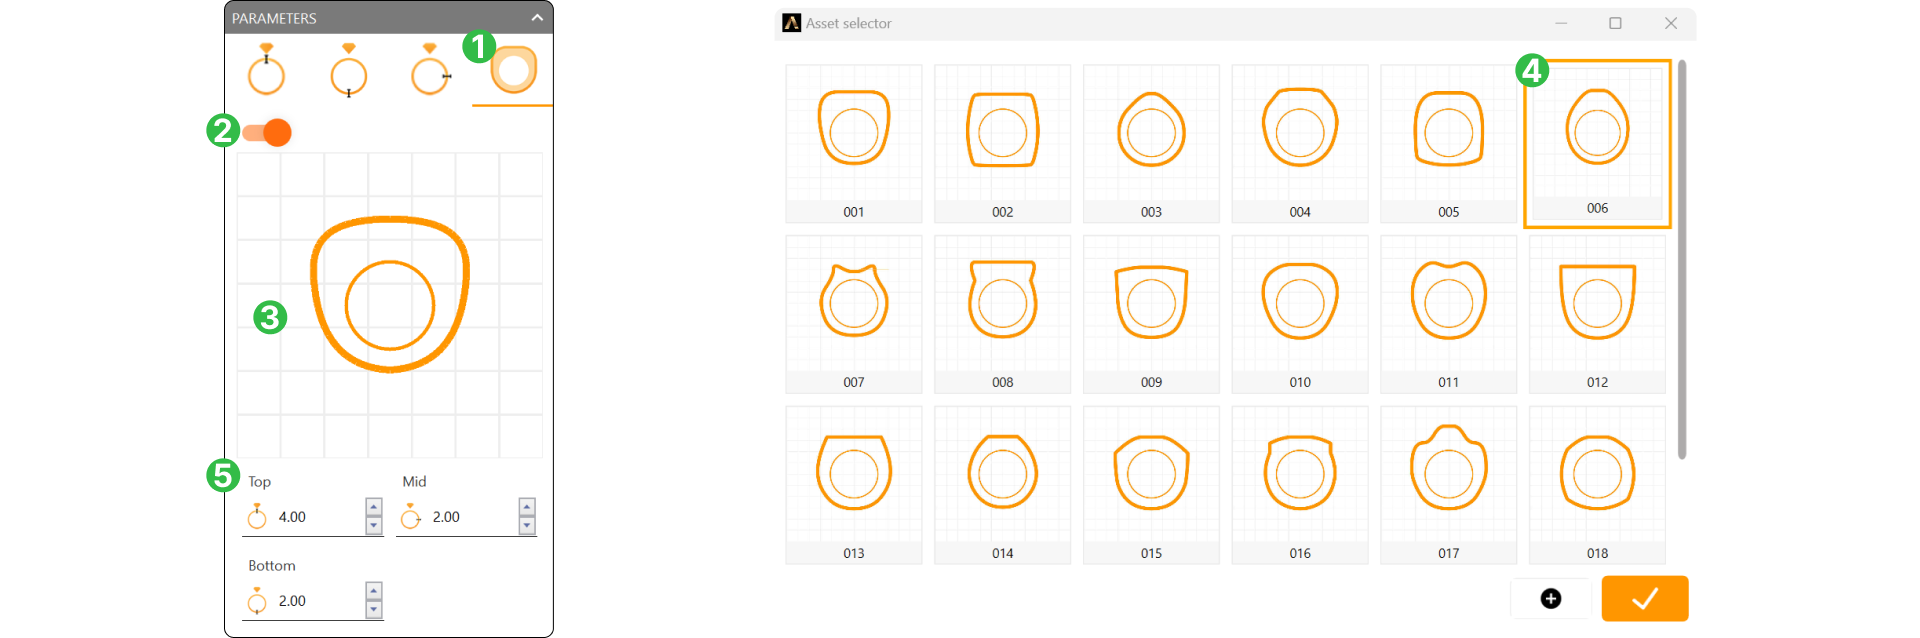
Step 6: External Profile
Turn on the External Profile tab, then select Profile 006 in the Asset Selector.
Set Parameters:
- Top: 4.0mm
- Middle: 2.0mm
- Bottom: 2.0mm
Step 7: Finishing
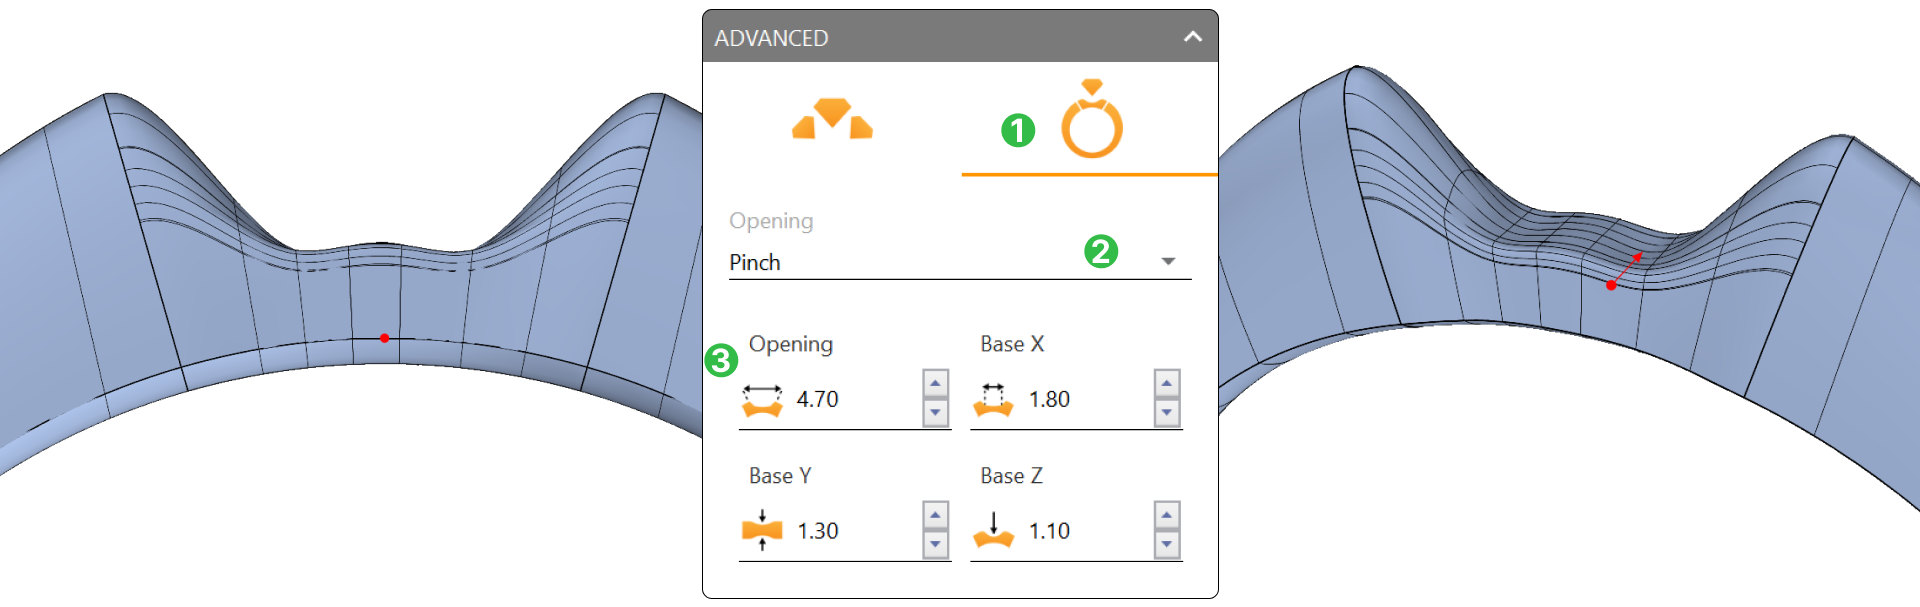
In the Advanced area, go to the Finishing tab (1), select Pinch (2) for the opening, and adjust the following (3):
- Opening: 4.7mm
- Base X: 1.8mm
- Base Y: 1.3mm
- Base Z: 1.1mm
Step 8: Apply Changes
Click Accept in the top-right to confirm your settings.
Video Lesson
Next Step: We’ll add a diamond and create the basket setting in the next lesson.