Creating Report Templates
Lesson 6 of 18
Editing the Template Layout
Sign in to access this lesson
This lesson is part of Jewelry Production & Manufacturing Essentials, which can come bundled with a RhinoArtisan Commercial license subject to current promotions. Log in with your customer account, or get in touch and we'll set you up.
Customers only
Solo para clientes
This lesson is part of Jewelry Production & Manufacturing Essentials, which can be included with a RhinoArtisan Commercial license subject to current promotions. If you've already purchased and don't see it in your account, get in touch.
1. Open the Default Report Template
From the File tab, click User Folder and open the Report folder in File Explorer. Double-click Report Template 1 — the default layout is your starting point.
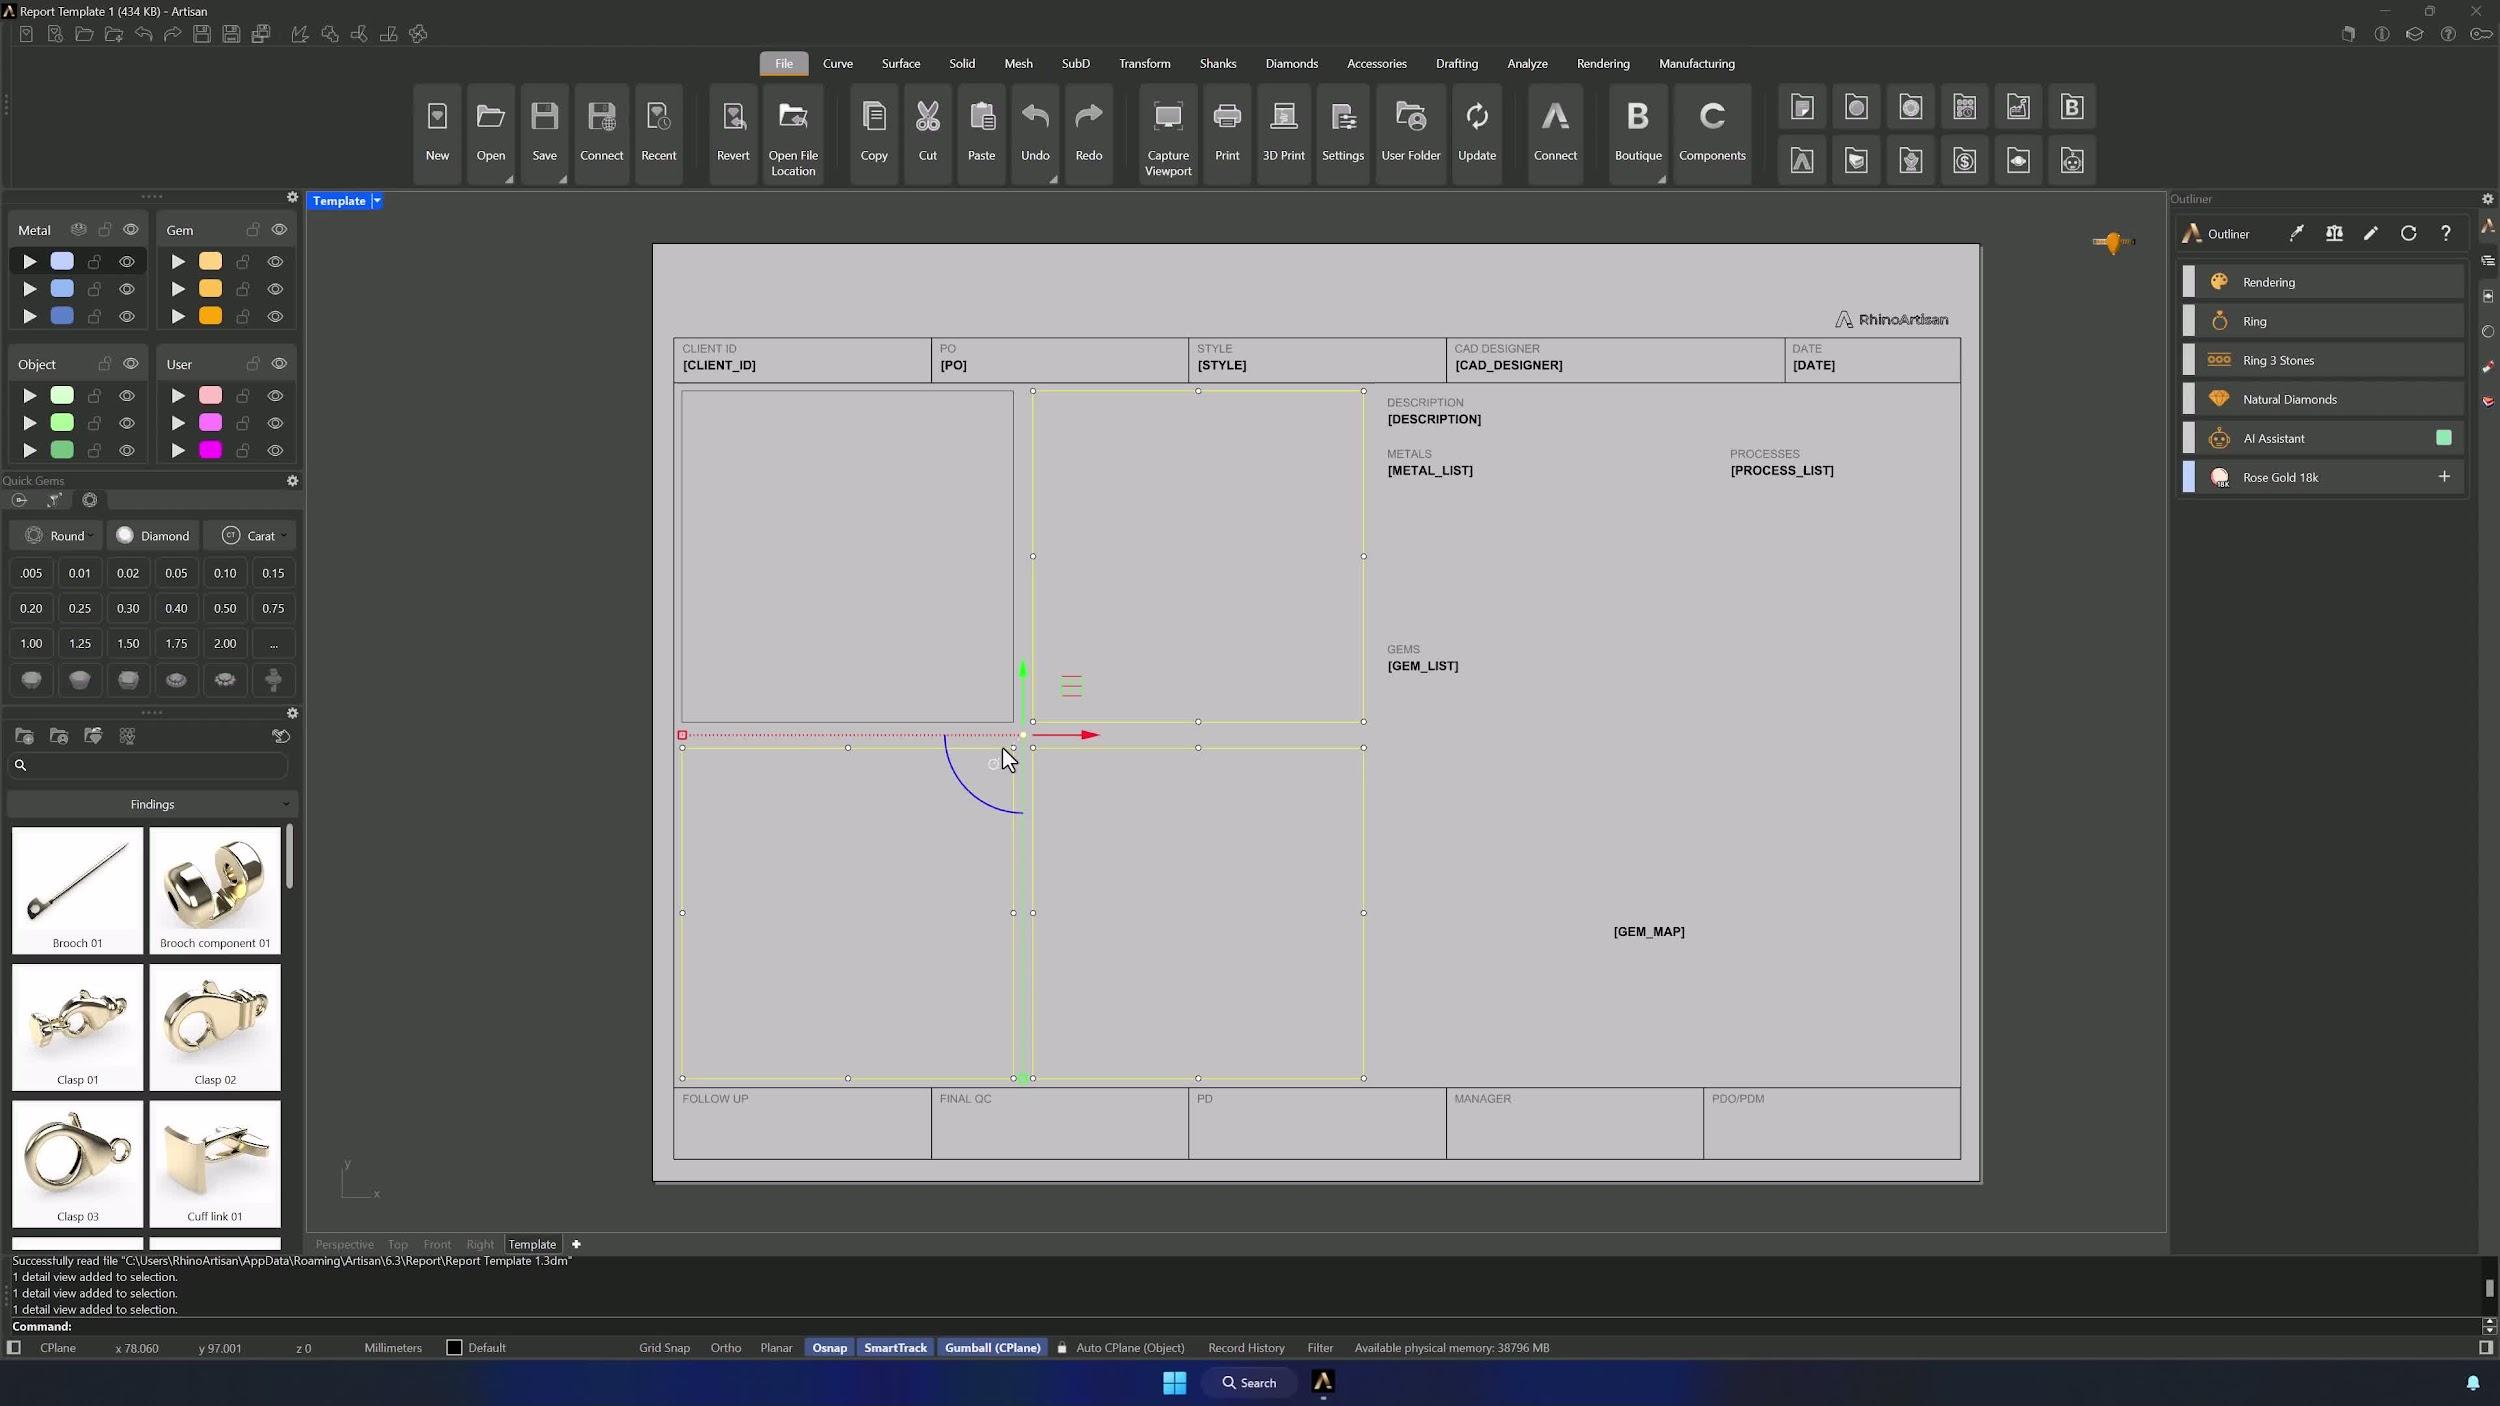
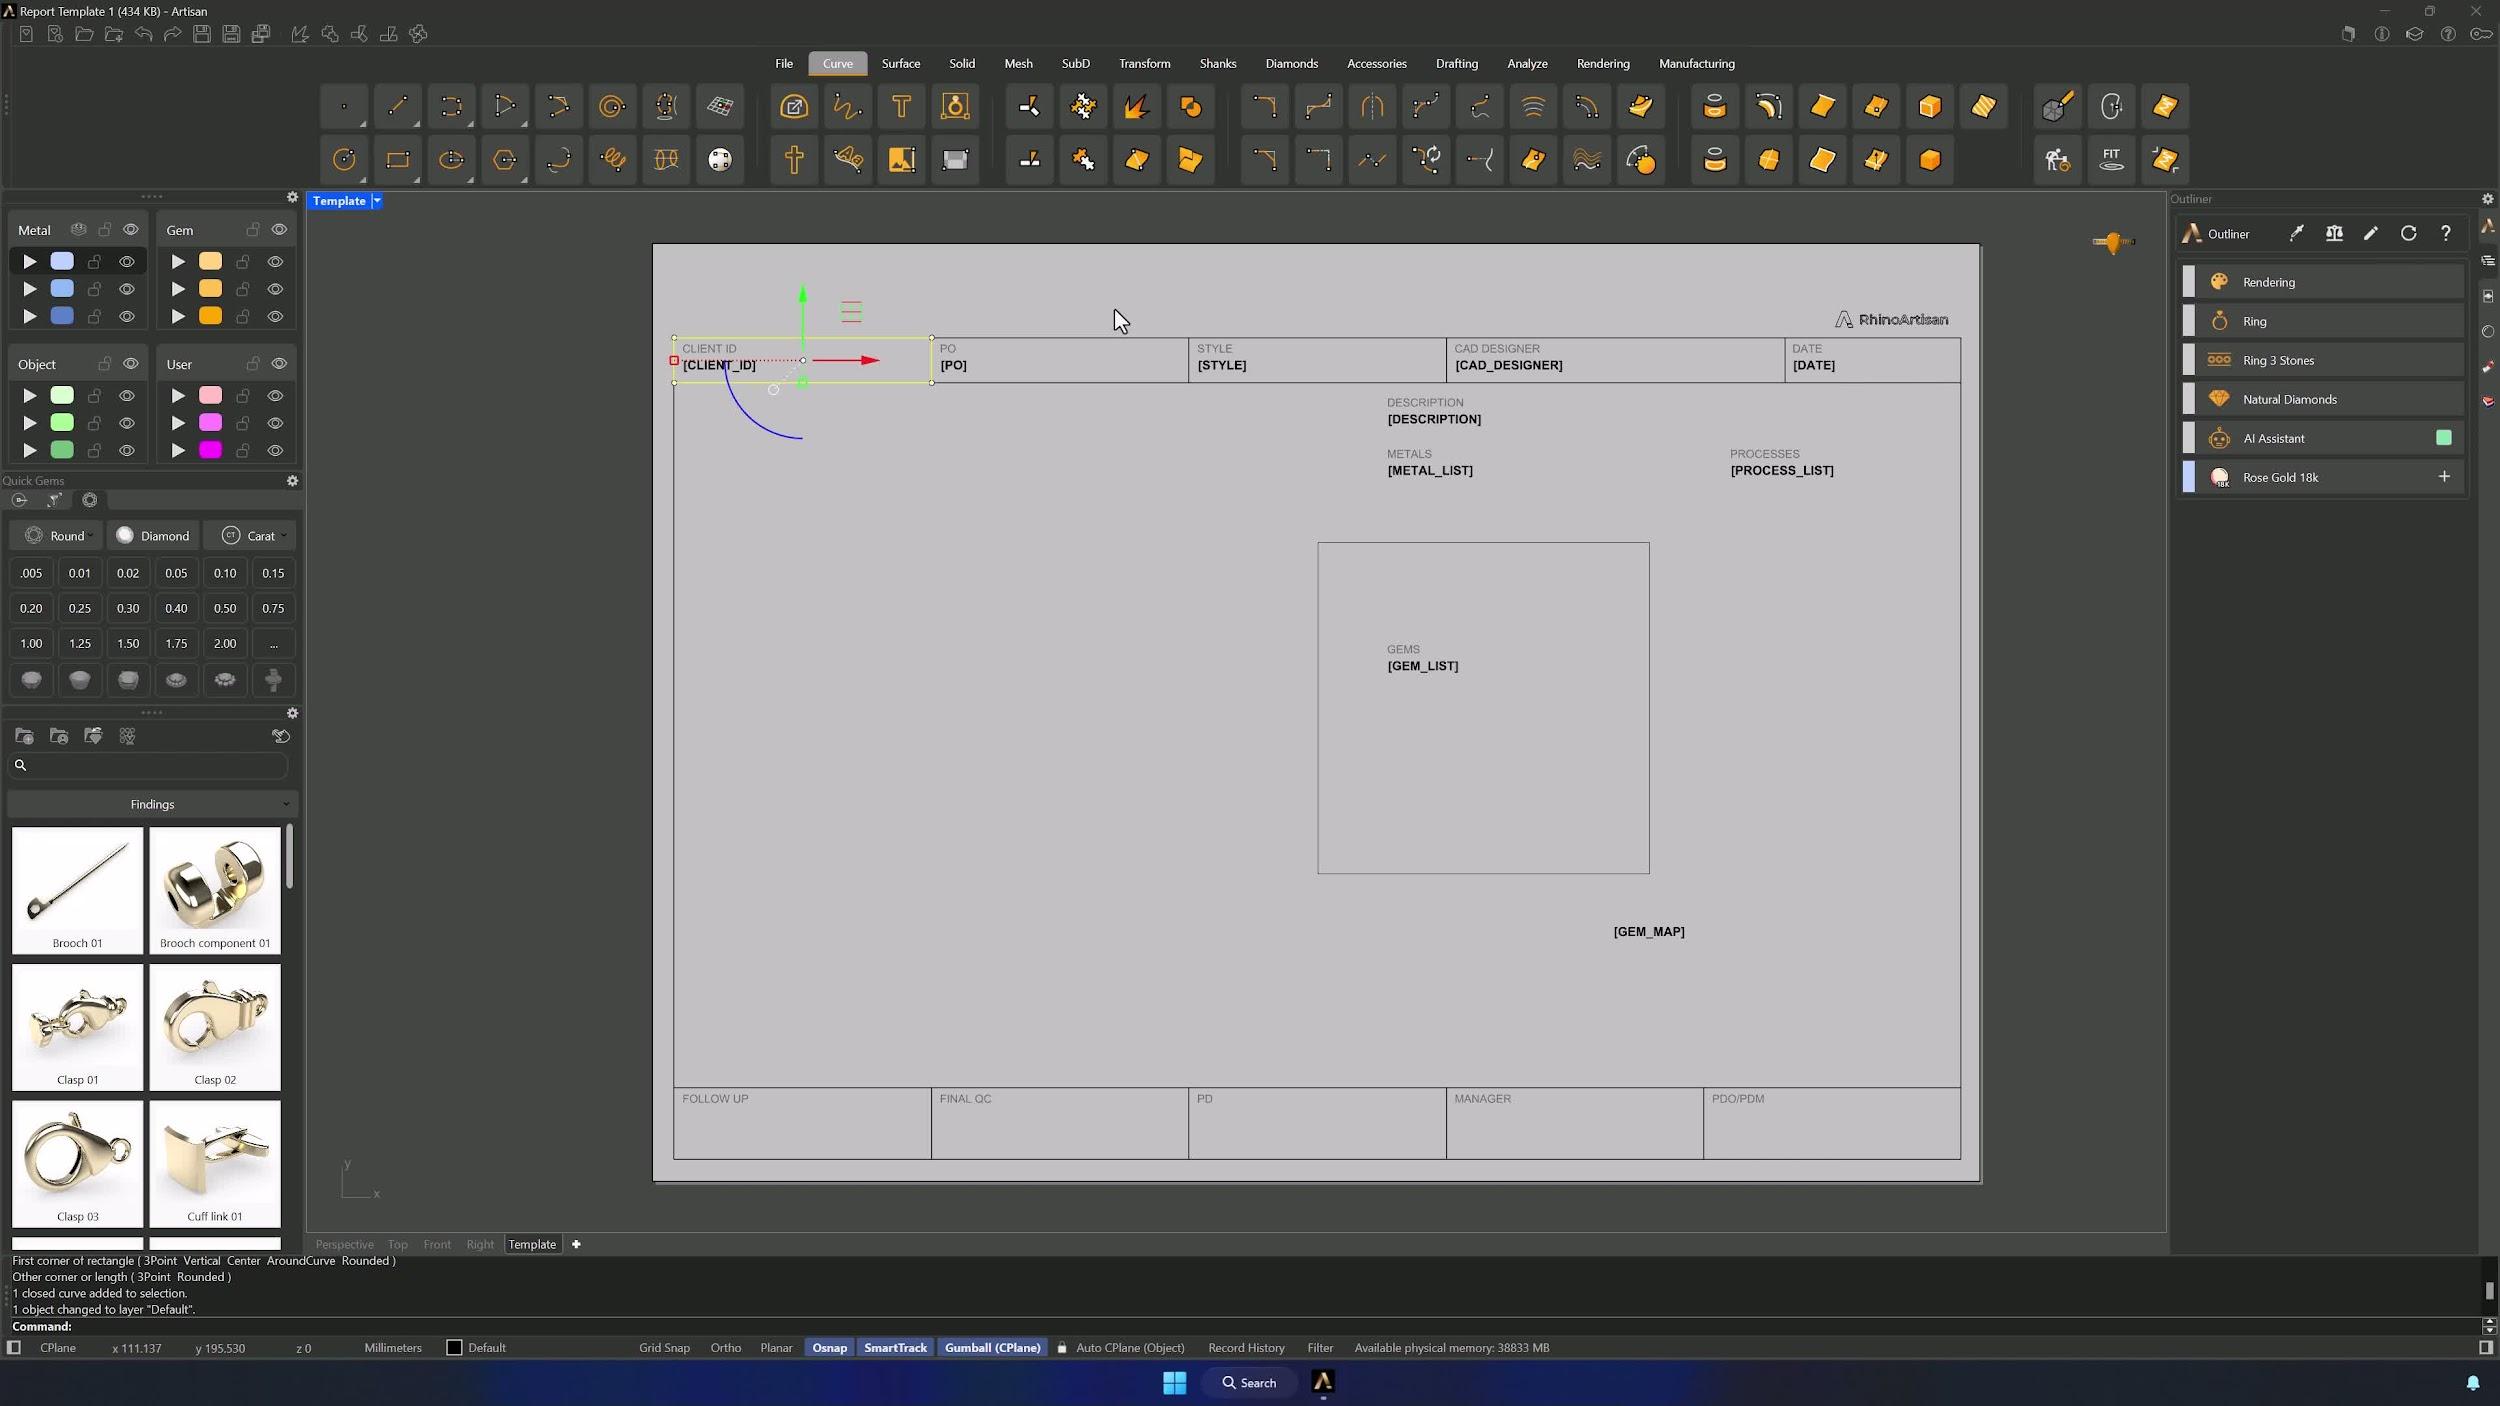
2. Remove Unneeded View Boxes and Build the Base Layout
Delete the extra view boxes, keeping only the one you need. Then draw a rectangle matching the Client ID box from the Curve tab, snapping points with OSNAP, and switch its layer to Default so it prints black.
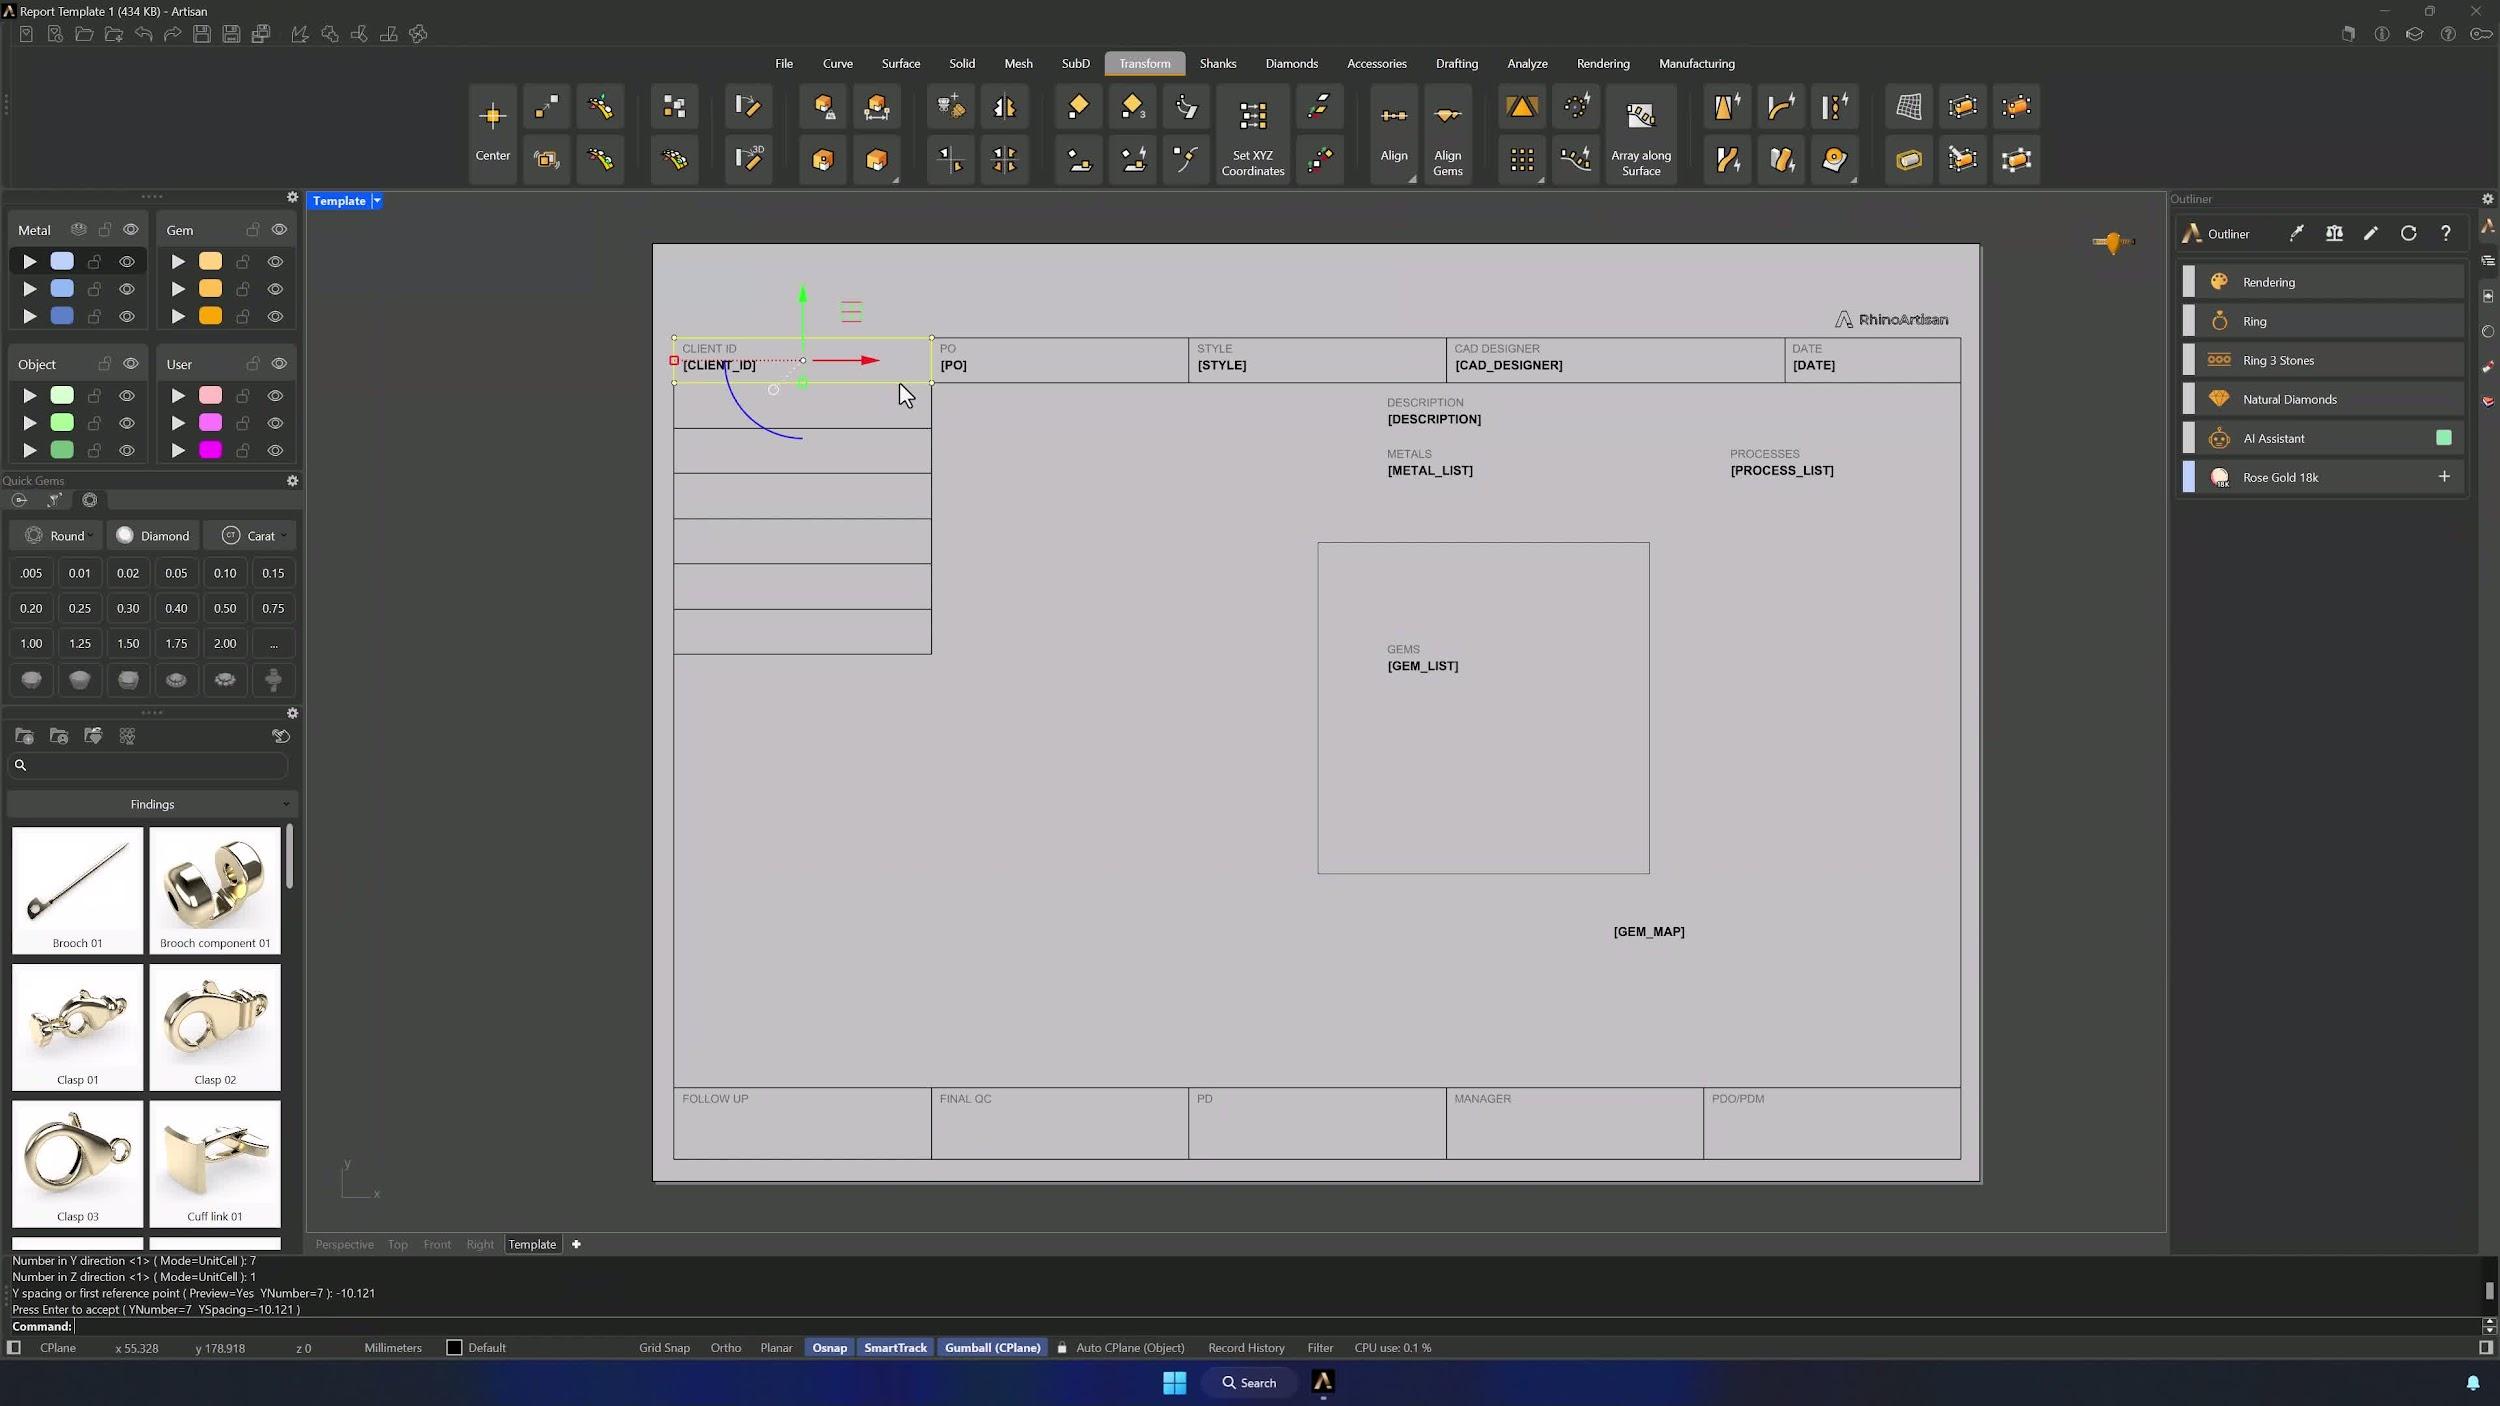
3. Duplicate the Box Structure for Additional Fields
Array the rectangle from the Transform tab: 1 repetition in X, 7 in Y, with Y spacing at −10.1 to match the existing boxes. Confirm and tidy the resulting curves.
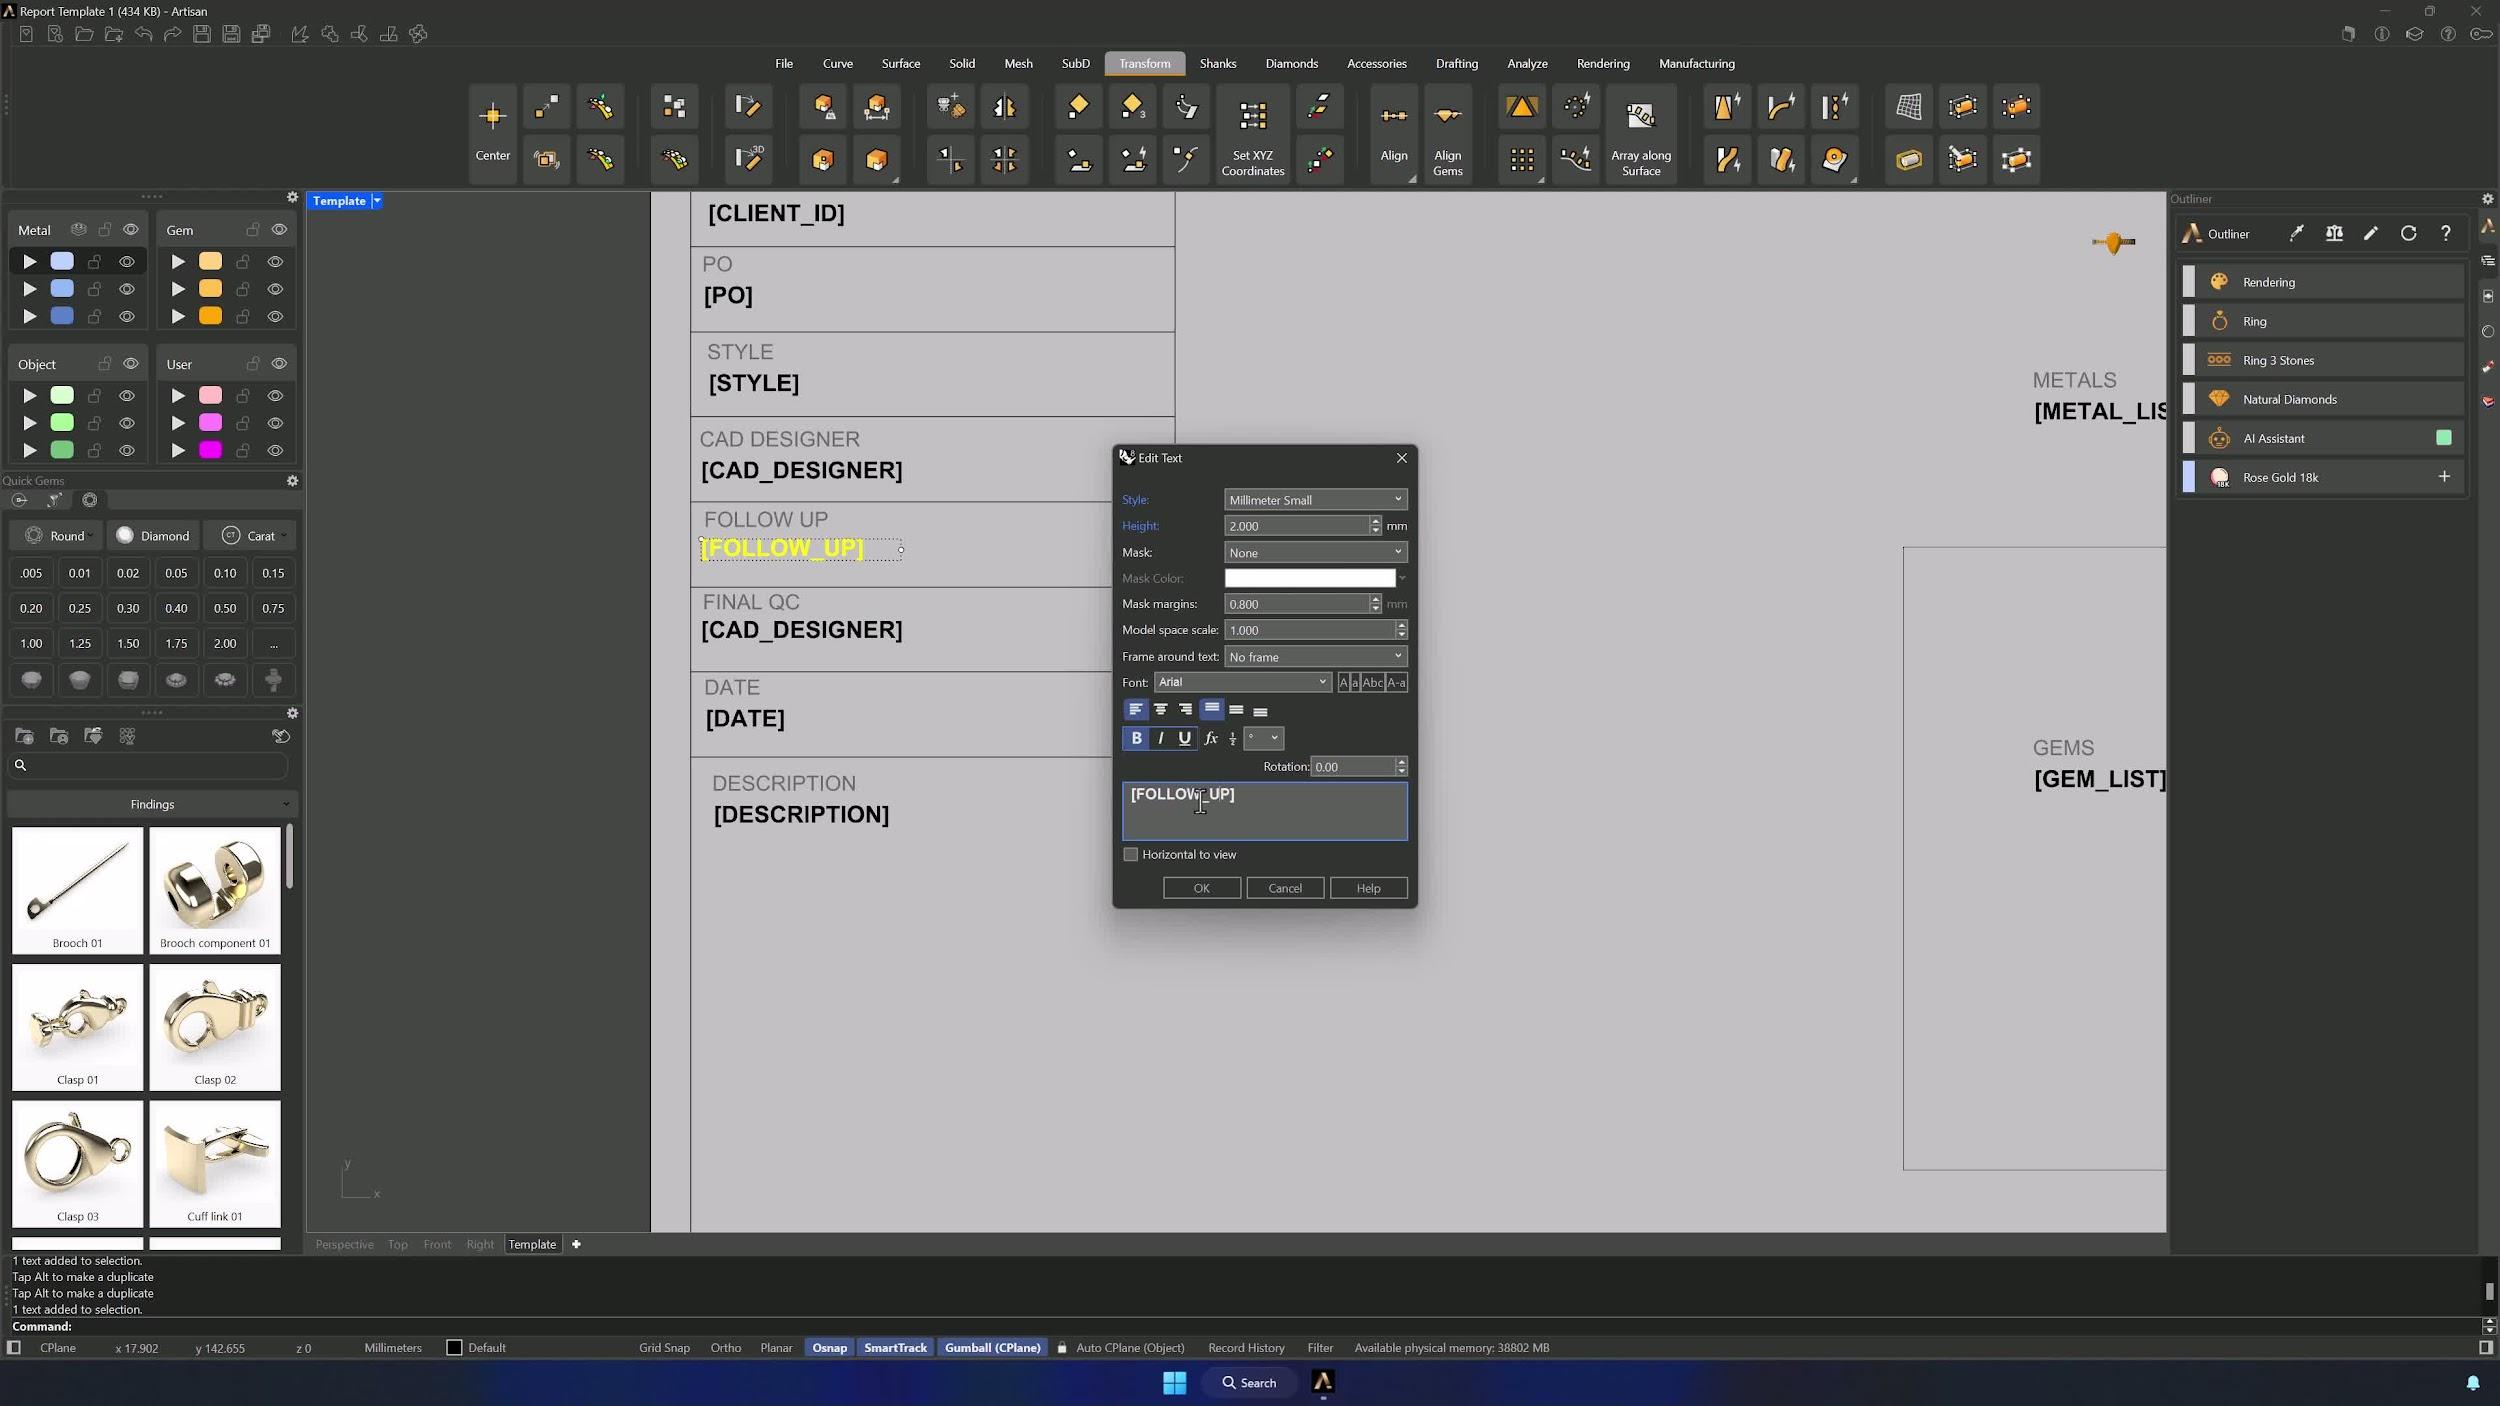
4. Edit Text Labels and Field IDs
Clear unnecessary lines, move each text into its box (Gumball + Alt-drag copies text fast), and rename the IDs by double-clicking. The rule that makes it all work: each bracketed ID must match its report field title exactly, with underscores instead of spaces.
Almost there — you still have some lessons to complete. Jump to the next one →
Impersonating — progress and reviews are disabled.
Course completed
You've completed Jewelry Production & Manufacturing Essentials 🎉
Great work. Get your certificate of completion and, if you have a minute, let other jewelers know what you thought of the course.