RhinoArtisan Modeling
Lesson 22 of 31
Preparing for Lateral Setting
Sign in to access this lesson
This lesson is part of From RhinoArtisan to Keyshot: Jewelry Rendering Essentials, which can come bundled with a RhinoArtisan Commercial license subject to current promotions. Log in with your customer account, or get in touch and we'll set you up.
Customers only
Solo para clientes
This lesson is part of From RhinoArtisan to Keyshot: Jewelry Rendering Essentials, which can be included with a RhinoArtisan Commercial license subject to current promotions. If you've already purchased and don't see it in your account, get in touch.
Objective: Learn how to prepare for lateral setting by creating reference curves and extracting an isocurve to correctly orient the lateral channels.
The lateral channels are built with the same logic as the central one: a pair of concentric circles that, once projected onto the shank, outline the opening of the channel, with the larger circle landing on the top surface and the smaller one on the inner side. In this lesson we’ll draw those two circles and extract a reference curve from the shank, so that in the next one we can position and project them exactly where the side stones will go.
To begin creating the lateral channels, go to the Curve tab and use the Circle command.
Set the center point to 0 in the command bar and press Enter, as we did for the central setting.
Ensure that the option in the command bar is set to Diameter, and input 6 mm as the diameter. This is the outer curve of the lateral channel, the one that will end up on the top surface of the shank.
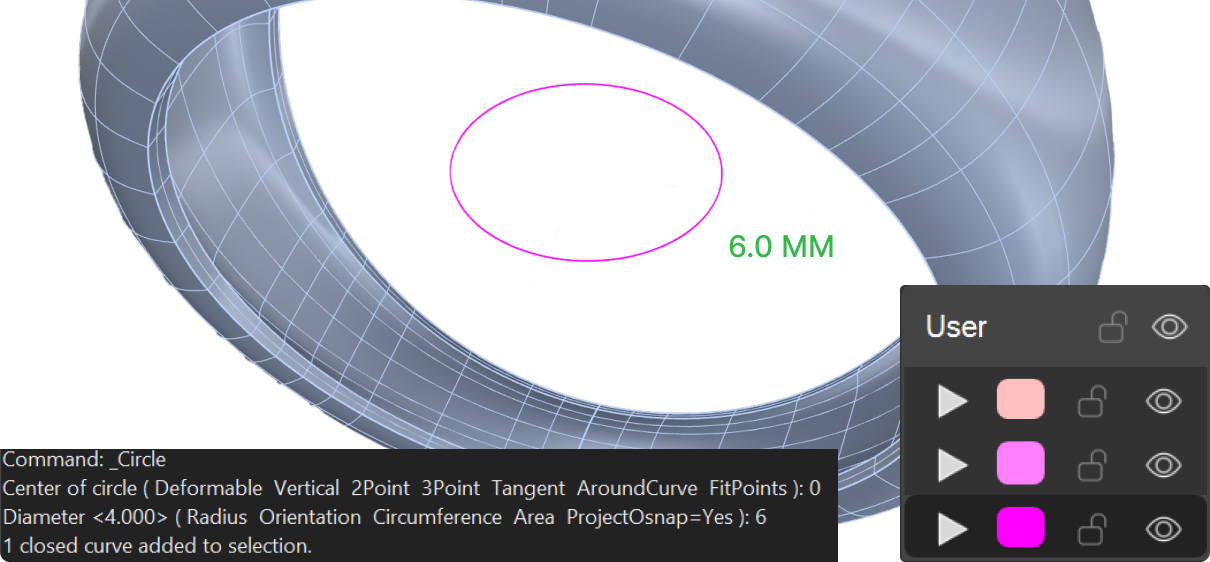
Make sure you are in the Top view when clicking to create the circle, ensuring it lies on the correct plane.
Creating the Second Circle
The second circle is the inner boundary of the channel, and the distance between the two is what gives the setting its width. Create another circle with a diameter of 3.25 mm:
Select the Circle command again or right-click to repeat the last command.
Type 0 and press Enter so both circles share the same center.
Input 3.25 to set the diameter, ensuring you are still in the Top view.
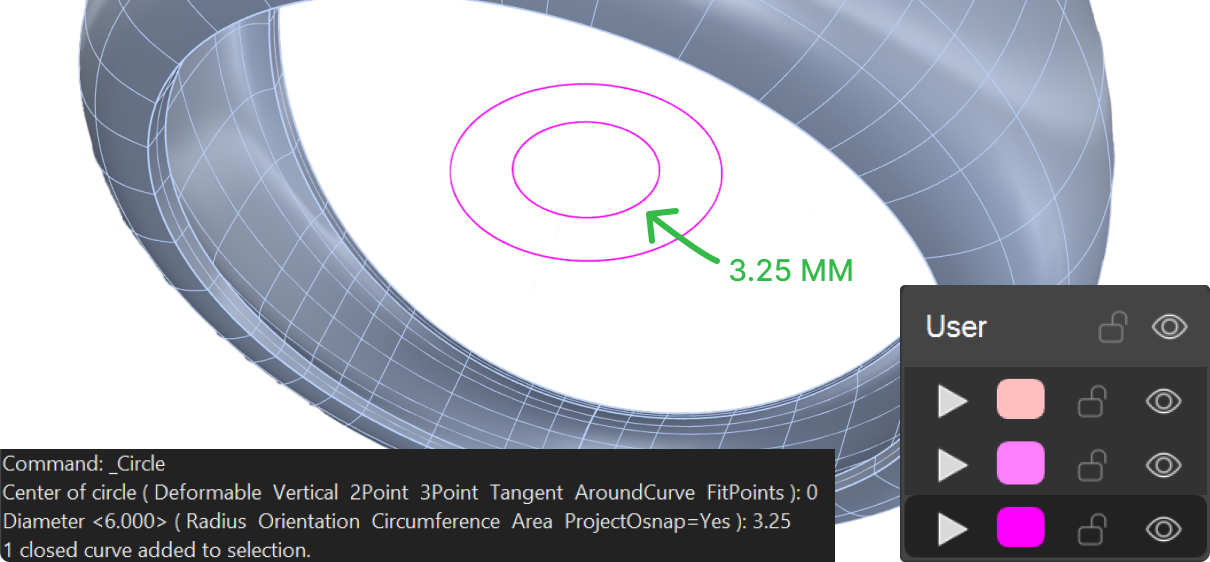
Organizing Curves by Layers
Seen from the top, these two circles overlap the model and are easy to lose among the rest of the geometry. As with the central setting, select them and click on the layer arrow to assign them to one of the User layers. From now on you can hide or show them with a single click, without touching the shank.
Extracting an Isocurve for Orientation
The circles we’ve just drawn are flat: they lie on the construction plane, while the shank is curved. To bring them onto the side of the ring we need a reference that already follows the shape of the shank, and an isocurve extracted from the shank’s own surface gives us exactly that.
Use the Extract Isocurve command found in the Curve tab.

Select the shank’s surface and change the direction to U in the command bar.
Click to create the central isocurve, the one running down the middle of the shank, and press Enter to complete the command.
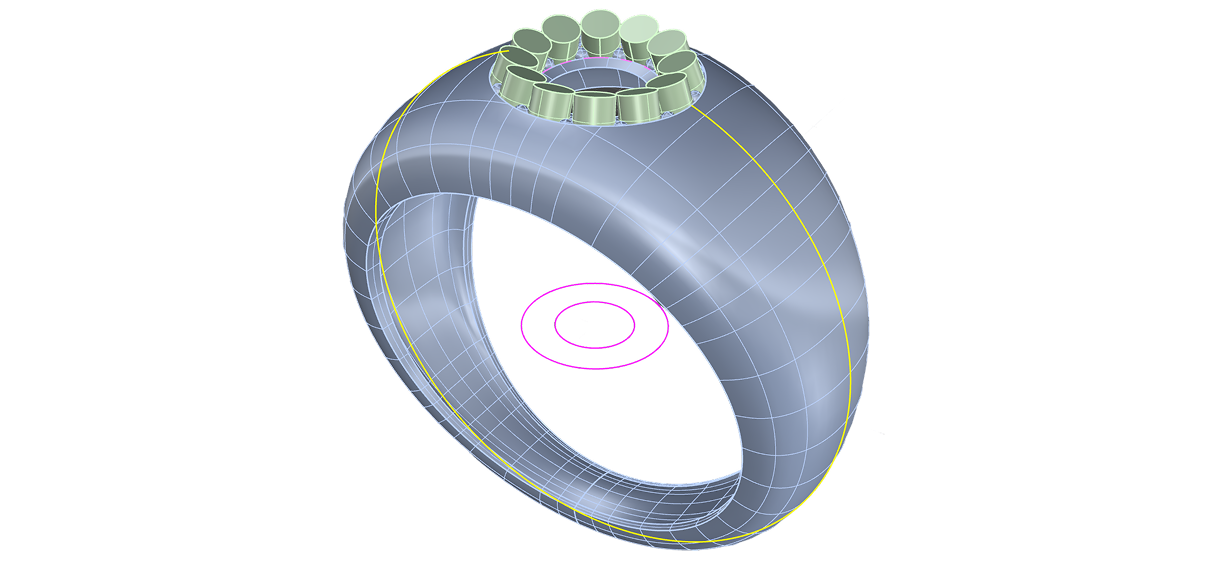
With the two circles drawn and the isocurve extracted, we have everything we need to place the lateral channel against the curvature of the ring.
Next Lesson: Positioning and Projecting Curves
Almost there — you still have some lessons to complete. Jump to the next one →
Impersonating — progress and reviews are disabled.
Course completed
You've completed From RhinoArtisan to Keyshot: Jewelry Rendering Essentials 🎉
Great work. Get your certificate of completion and, if you have a minute, let other jewelers know what you thought of the course.