RhinoArtisan Modeling
Lesson 26 of 31
Adding Gems to the Lateral Channels
Sign in to access this lesson
This lesson is part of From RhinoArtisan to Keyshot: Jewelry Rendering Essentials, which can come bundled with a RhinoArtisan Commercial license subject to current promotions. Log in with your customer account, or get in touch and we'll set you up.
Customers only
Solo para clientes
This lesson is part of From RhinoArtisan to Keyshot: Jewelry Rendering Essentials, which can be included with a RhinoArtisan Commercial license subject to current promotions. If you've already purchased and don't see it in your account, get in touch.
Objective: Learn how to add gems to the lateral channels of the model by using reference curves and applying the correct settings for prongs and cutters.
The lateral channels are already carved into the shank, so now it’s time to fill them with stones. The workflow is the same one we used in the central channel: the gems need a curve to follow and a surface to sit on.
Create the Reference Curve
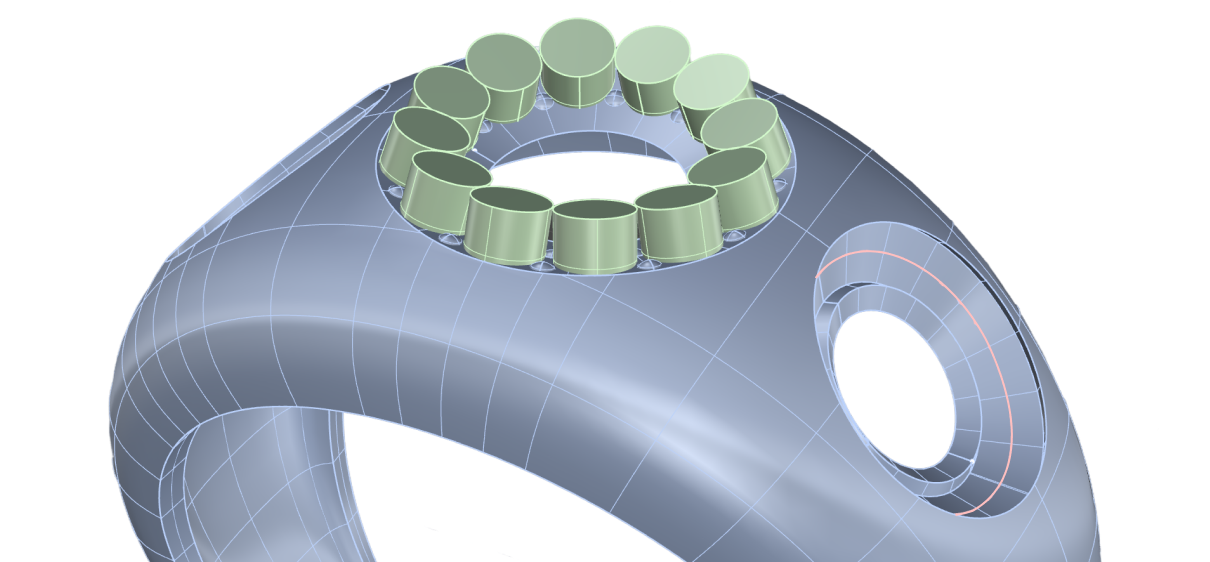
The stones can’t be placed freehand. They need a path running along the middle of the channel, and we extract it as an isocurve from the channel surface itself, so it follows the exact shape of the metal.
Go to the Curve tab and use the Extract Isocurve command.

Select the central seam of one of the lateral channels, and change the direction to V in the command bar. Then select the central point of the channel surface and press Enter to create the isocurve.
Place the Gems
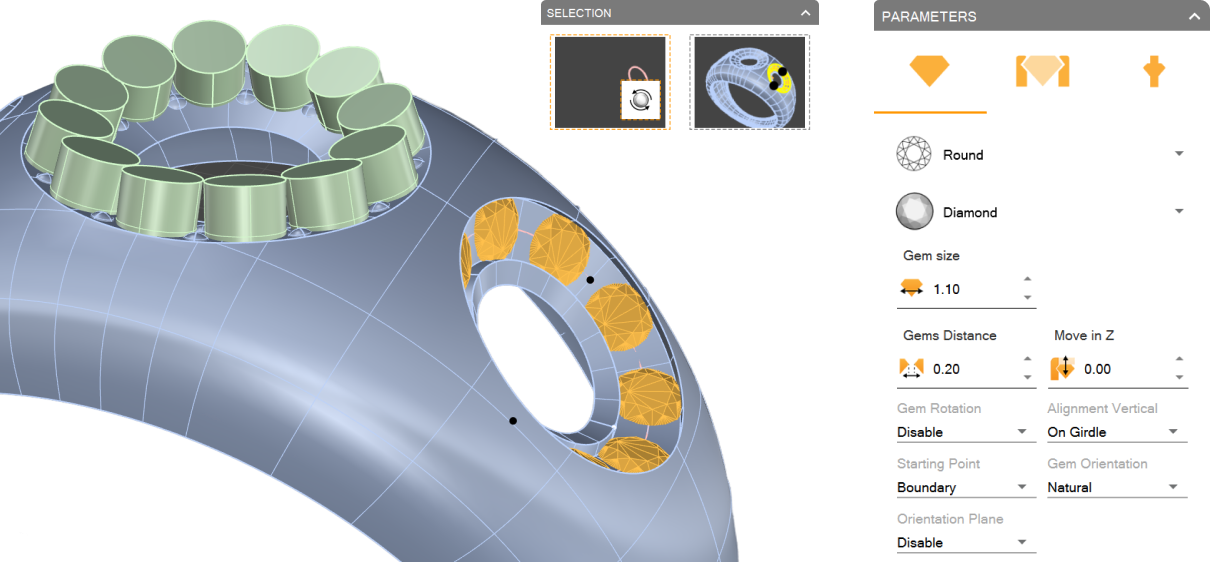
With the path ready, go to the Diamonds tab and use the Gems by Curve command.

The command asks for two references: select the isocurve we just created as the curve, and the surface of the channel as the reference surface. Take a moment to look at the result: the gems adapt to the surface on their own, so they follow the curvature of the channel instead of sitting in a flat row.
Adjust the Gem Parameters
Here we change one of the gem parameters: set the Gem Size to 1.1.
Adjust the Prongs
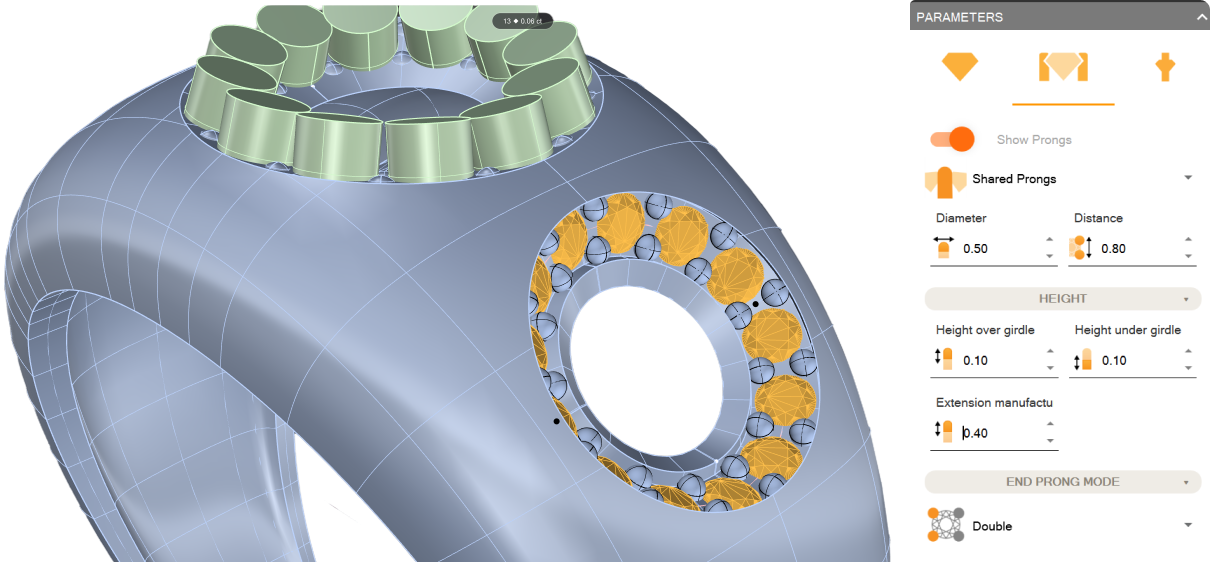
The prongs are what will actually hold each stone in place. In the Prongs tab, enable the prongs and set the following values:
- Height Over Girdle: 0.1 mm
- Height Under Girdle: 0.1 mm
- Manufacturing extension: 0.4 mm
Adjust the Cutters
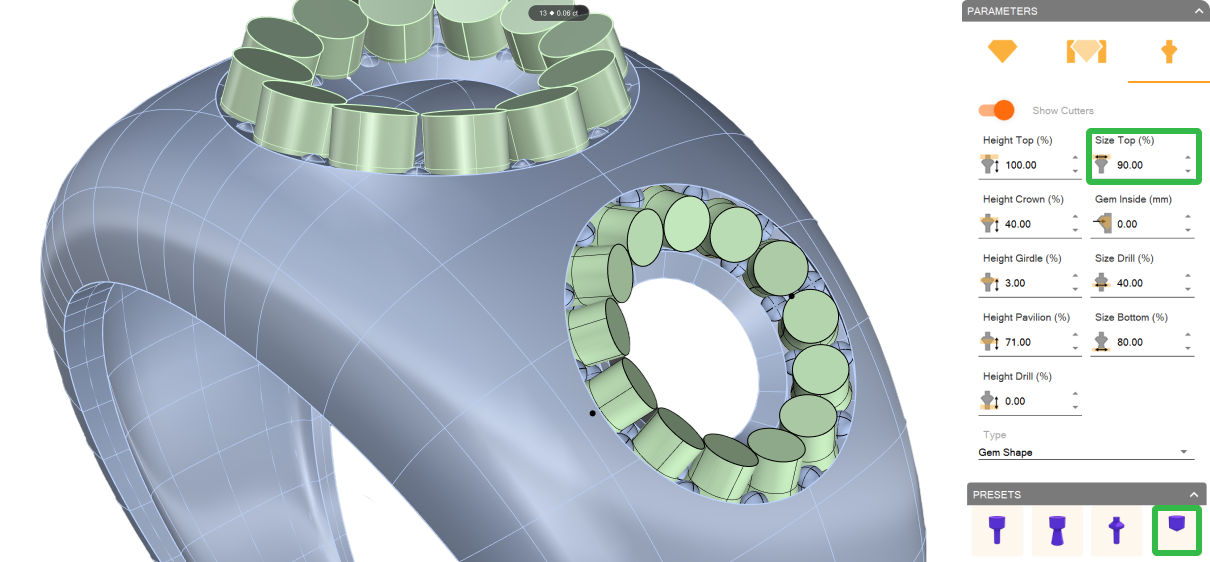
The cutters are the volumes that will later be subtracted from the metal to open the seat for each stone, so they define how the gems sit inside the channel. In the Cutters tab, leave the parameters by default and set the preset to Preset 4.
Mirror to the Other Side
Instead of repeating the whole process on the opposite channel, we’ll mirror the setting we’ve just built. Select the Shank and type Hide in the command bar. With the shank out of the way, it’s much easier to pick only the elements we want to copy.
Now select the gems, prongs and cutters, go to the Transform tab and use the Mirror command. Type 0 in the command bar and press Enter to establish the mirror center.

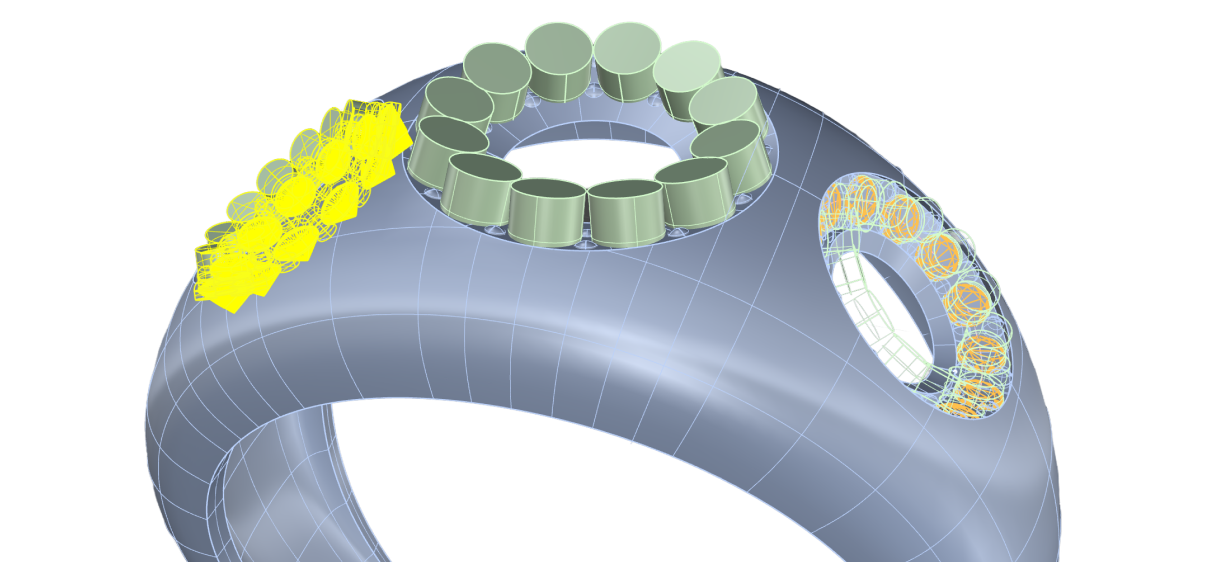
From the front view, hold Shift and click on the top of the model to mirror it correctly, the same way we mirrored the lateral channel solid.
Show the Shank
Type Show in the command bar to bring the shank back, and you’ll see both lateral channels set with their stones.
Result: The gems are now added to the lateral channels with the correct prongs and cutters.
Next Lesson: Creating the Final Solid Model
Almost there — you still have some lessons to complete. Jump to the next one →
Impersonating — progress and reviews are disabled.
Course completed
You've completed From RhinoArtisan to Keyshot: Jewelry Rendering Essentials 🎉
Great work. Get your certificate of completion and, if you have a minute, let other jewelers know what you thought of the course.